The Lenovo portable monitor, such as the ThinkVision M14, makes working on the go simple. Even if you’re new to portable monitors, this guide helps you set up effortlessly. These devices extend your screen for presentations, travel, or remote work, making them helpful for beginners using laptop portable monitors, best portable monitor for macbook pro, or portable monitor for laptops.
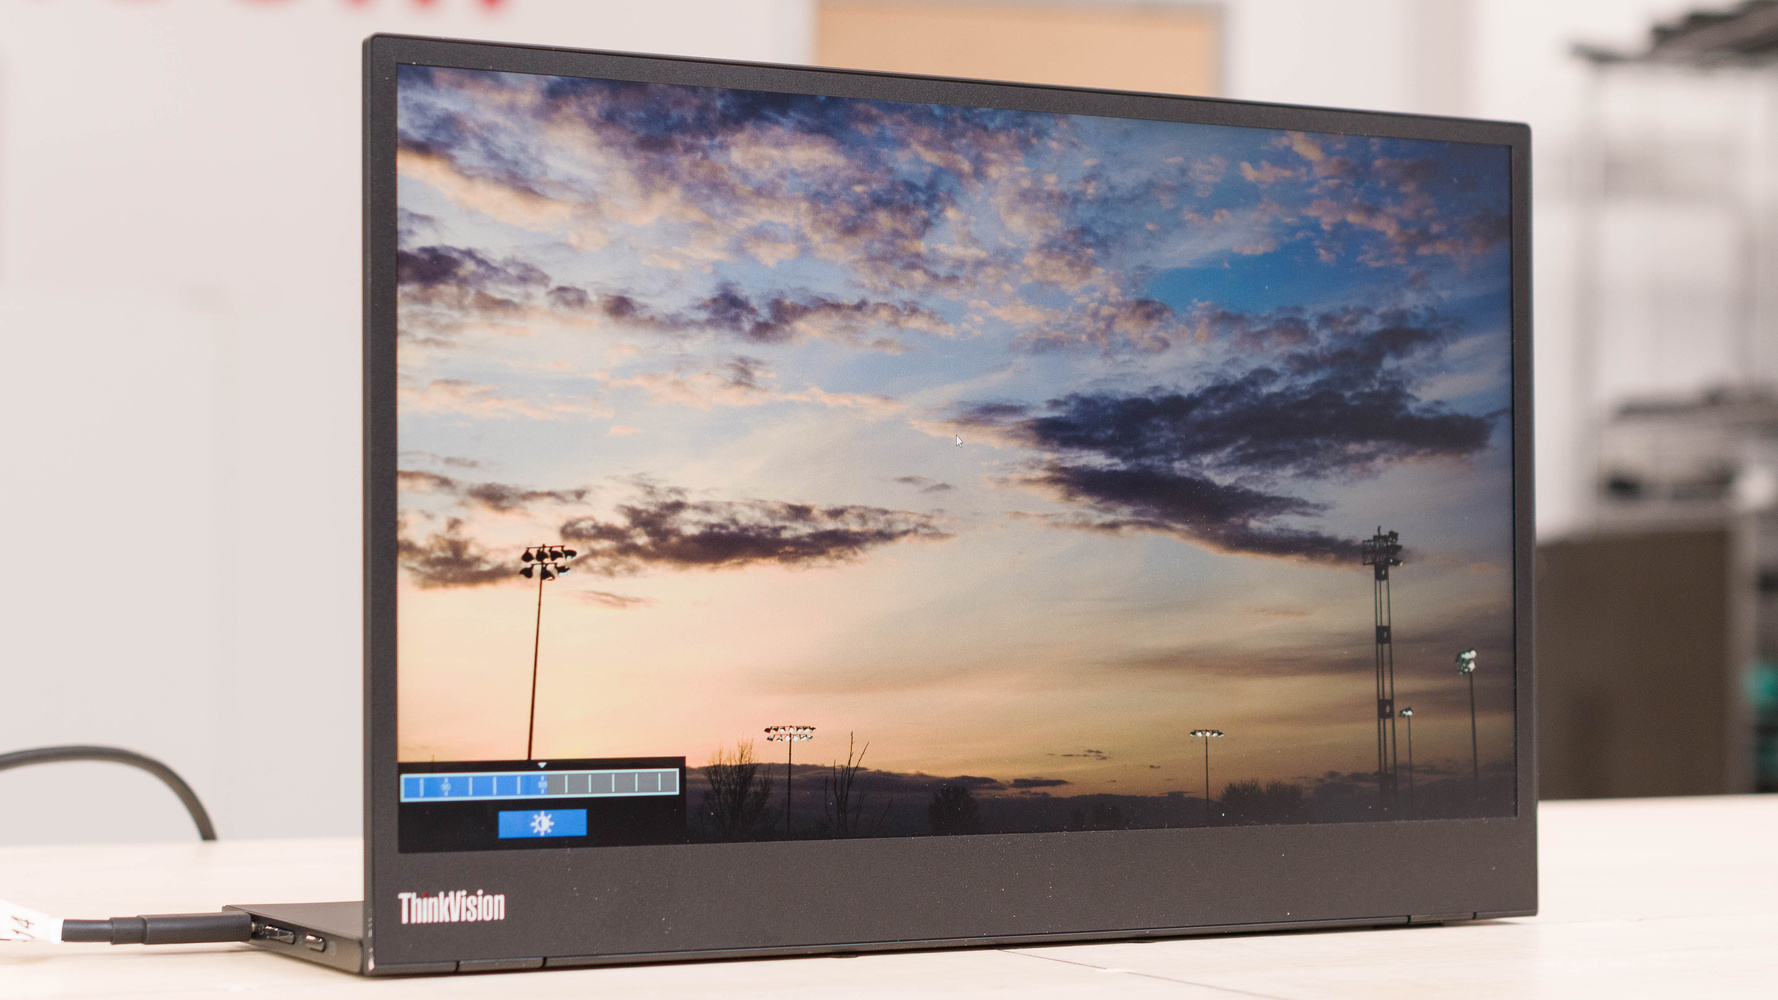
The ThinkVision M14 is an ultra‑compact and lightweight 14‑inch Full HD (1920 × 1080) portable monitor that weighs only about 0.57 kg (1.26 lb) and measures just 4.4 mm thickness without the stand. Featuring a crisp IPS panel with 300 cd/m² brightness, 6 ms response time, 60 Hz refresh rate, 178° viewing angles, and 72% NTSC color gamut, it delivers vivid colors and sharp visuals.
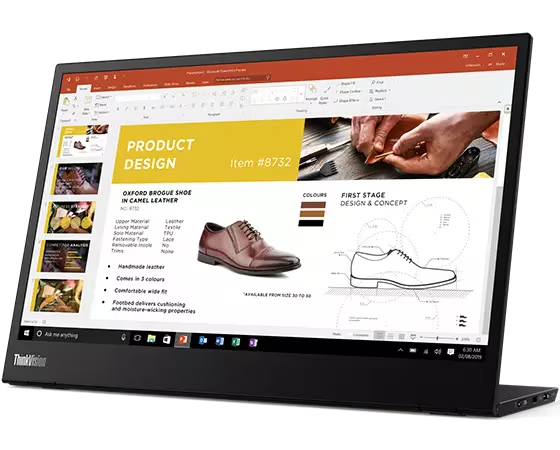
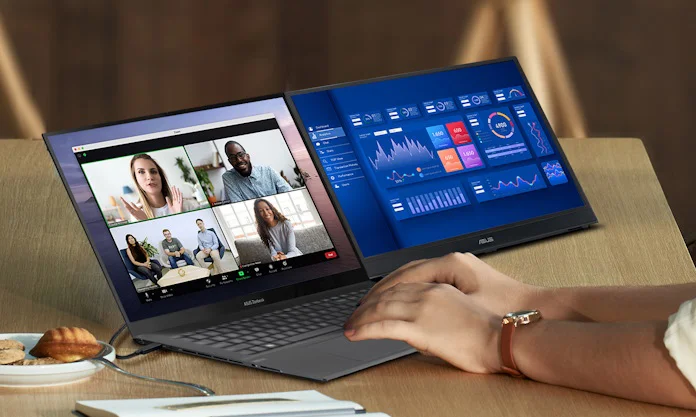
The ThinkVision M15 :15.6-inch Full HD portable monitor designed for on-the-go professionals. Featuring an ultra-slim and lightweight design (weighing just 860g), it offers a crisp IPS display with wide viewing angles. With dual USB-C ports, it supports both power and video through a single cable and includes power pass-through functionality for seamless connectivity. Ideal for travel, dual-screen setups, or remote work, the M15 delivers reliable performance and eye comfort with TÜV Rheinland Low Blue Light certification.
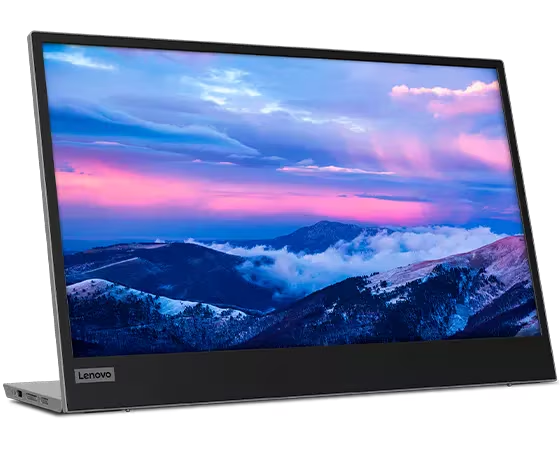
The ThinkVision L15 is a slim and ultra‑portable 15.6-inch Full HD (1920 × 1080) IPS monitor that weighs just about 860 g with a mere 6 mm thickness. Featuring a flicker‑free, anti‑glare panel rated at 250 nits and a 60 Hz refresh rate, it delivers vivid visuals with wide 178° viewing angles and TÜV Rheinland low blue light certification for eye comfort .
2. Preparing Your Laptop: USB‑C Power/Data Requirements
Your laptop must support USB‑C DP Alt Mode (DisplayPort 1.2 or higher) and USB Power Delivery (PD 2.0 or above) to power and send video over a single cable. Ensure your USB‑C port can deliver at least 10W for the monitor. Some laptops and phones may not supply enough power. When in doubt, use a 45 W or higher external charger to feed the monitor and charge the laptop. This avoids issues like “usb‑c portable monitor not working” scenarios where cables or power are insufficient.
3. Step‑by‑Step: Connecting Lenovo Portable Monitor to Laptop
Use a quality USB‑C to USB‑C cable rated at 5 A.
Plug into either side USB‑C port of the M14.
Connect the other end to your laptop that supports DP Alt Mode.
If your laptop has only one port, you can plug in a USB‑C charger to the other port on M14 to supply both monitor and laptop charge simultaneously. If no signal, check cable quality or lack of DP Alt support. Reddit users confirm a MacBook setup worked with proper USB‑C to USB‑C cable and charger; poor cables or chargers led to monitor sleep mode.
🎥 Video Setup Highlight
This quick video shows how lightweight and easy the ThinkVision M14 is to unpack and connect via USB‑C.
4. How to Adjust Brightness via OSD Controls on Lenovo ThinkVision
Lenovo portable monitors include on-screen display (OSD) controls—usually soft buttons at the side or back. Use them to adjust brightness, contrast, and low blue light settings. Open the OSD menu, select brightness, then increase or decrease as needed. Anti‑glare screens help maintain comfort in bright environments.
5. How to Install Lenovo Software like ThinkColor or Display Utilities
Install Lenovo ThinkColour or Accessories and Display Manager (formerly Display Control Center) from Lenovo support. It supports Windows 10, 11, and Mac OS for controlling monitor settings from your OS. Download the driver for M14 or M14t from Lenovo support site and follow guided prompts for setup and optimal resolution and color profiles.
6. Tips to Avoid Power/Wattage Problems and “No Signal” Issues
Use high‑quality USB‑C cables rated for 5 A.
Avoid using low‑wattage chargers like some phone bricks; they may not power the monitor.
Always check laptop’s USB‑C supports DP Alt Mode.
If monitor shows no display, try a different cable or charger known to work with MacBook or other laptops that successfully power the monitor.
7. Travel and Stand Setup Best Practices for Stability
Lenovo’s built‑in adjustable foot allows tilt between -5° to 90° and some height adjustment for comfort. When traveling:
Fold the foot flat and carry the monitor in a padded sleeve or case.
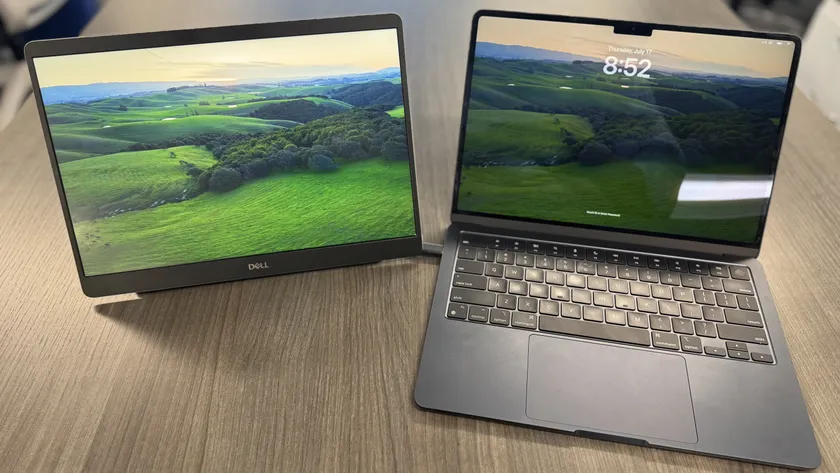
This guide applies equally to many other popular models: forhelp portable monitor, Arzopa, Lepow, Dell portable monitor, HP portable monitor, Acer, ASUS portable monitor, and ViewSonic portable monitor. Many users face similar portable monitor no signal, setup, or brightness reset issues with these brands.
Conclusion: Why Choose Lenovo Portable Monitor
The Lenovo portable monitor family—starting with ThinkVision M14—offers an ultra‑portable, bright, and user‑friendly second screen. For working, presenting, or gaming, they pair well with laptop portable monitor setups and connect via a single USB‑C. Easy on beginners, yet rich in features, they rank among the best portable monitor for macbook pro, portable monitor for laptops, and simple to setup portable monitor setup.
Dell portable monitor users often ask how to connect portable monitor to laptop. This simple guide helps beginners plug in a Dell portable monitor easily and optimize settings.
Why Use a Dell Portable Monitor with Your Laptop?
Adding a portable monitor for laptops increases screen space for work, gaming, travel, or study. Many best portable monitor lists include models like Dell Pro 14 Plus with USB‑C and power delivery, so you can run your laptop and monitor from one cable.
1. Identify Your Laptop and Dell Portable Monitor Ports
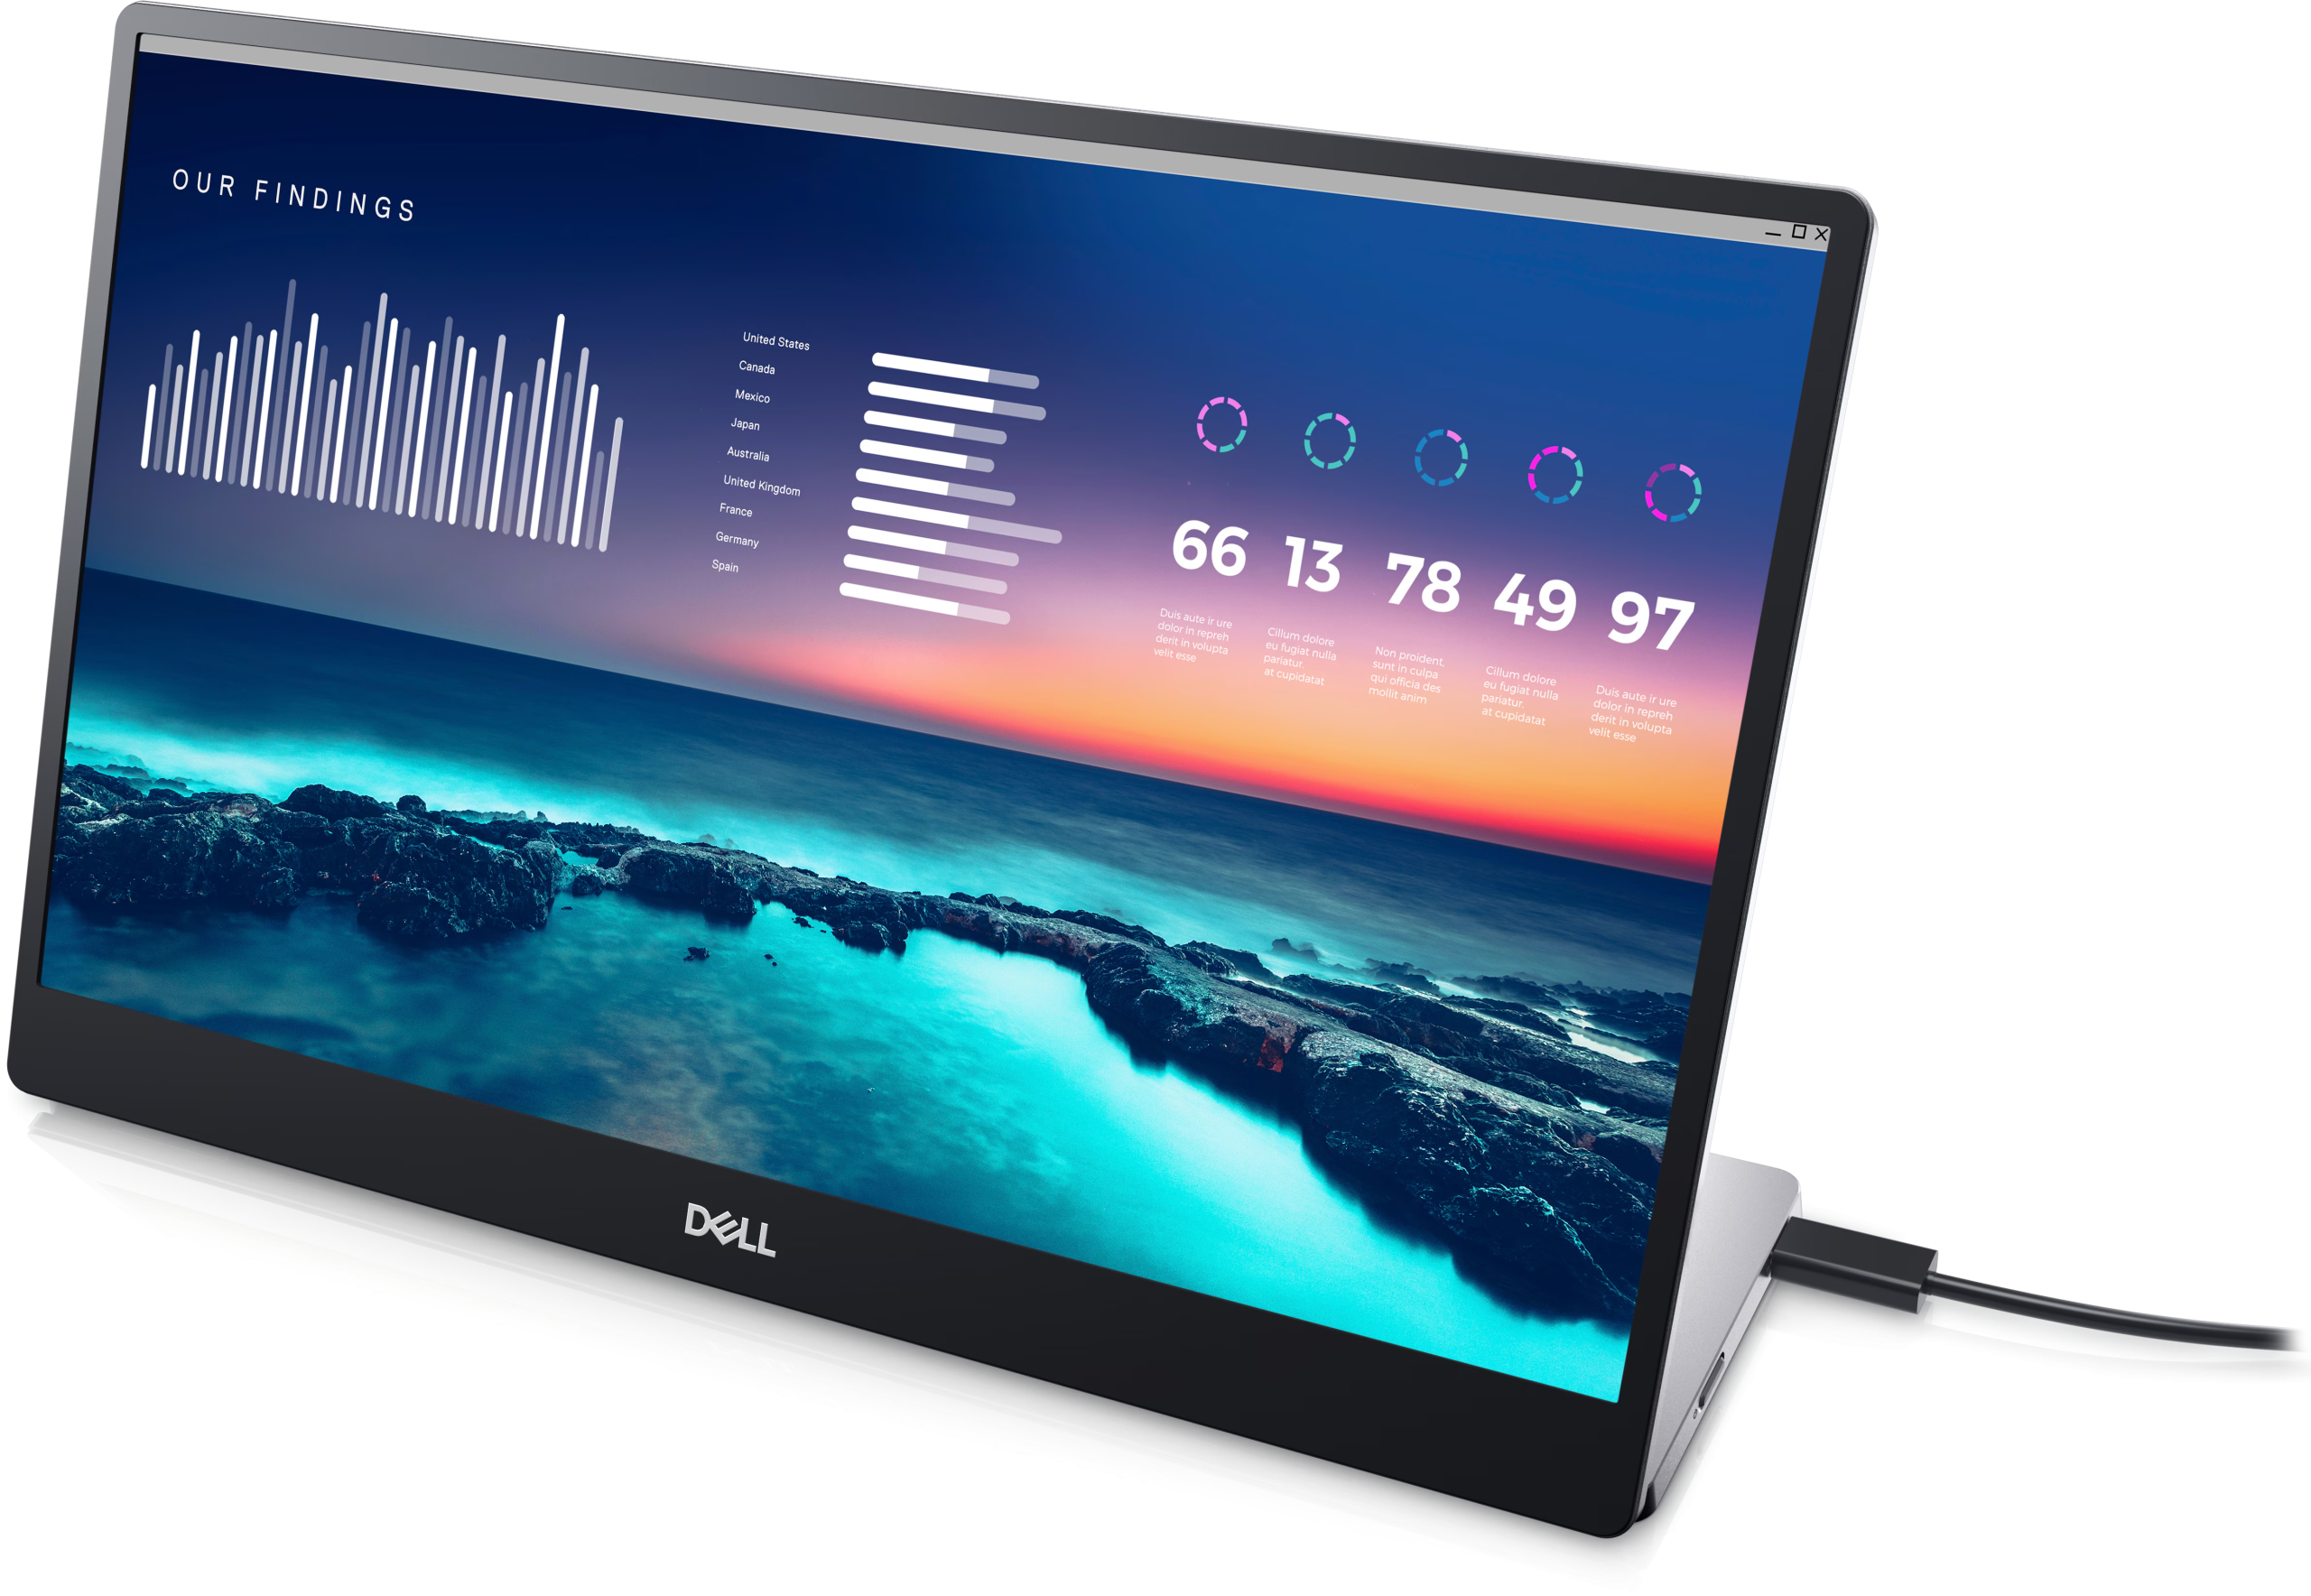
Check your laptop port: USB‑C (DisplayPort Alt‑Mode or Thunderbolt), HDMI, or older VGA/DisplayPort. The Dell P1424H portable monitor uses two USB‑C ports, supports video via DisplayPort Alt‑Mode, and delivers up to 65 W power delivery . Other Dell models like the C1422H also only support USB‑C connections .
The Dell P1424H portable monitor
2. Choose the Right Cable or Adapter
If you have USB‑C with Alt‑Mode on both devices, use a USB‑C to USB‑C cable.
If your laptop has HDMI or DP only, use a USB‑C to HDMI adapter (on the monitor side) or HDMI‑to‑USB‑C if supported. Make sure your adapter supports video output, not just charging.
Old laptops with VGA only may not work unless you use a video‑enabled adapter.
3. Connect and Power Up
Turn off both devices.
Use the appropriate cable/adapter to connect your laptop to the portable monitor. If model supports power delivery, one USB‑C cable handles video and power.
Turn on the monitor and then your laptop. Windows should detect the display automatically.
4. Configure Windows Display Settings
Once connected, go to Settings > System > Display:
Choose Extend or Duplicate in Multiple displays.
Arrange display order by dragging icons.
Set resolution to recommended (usually 1920×1080 for P1424H).
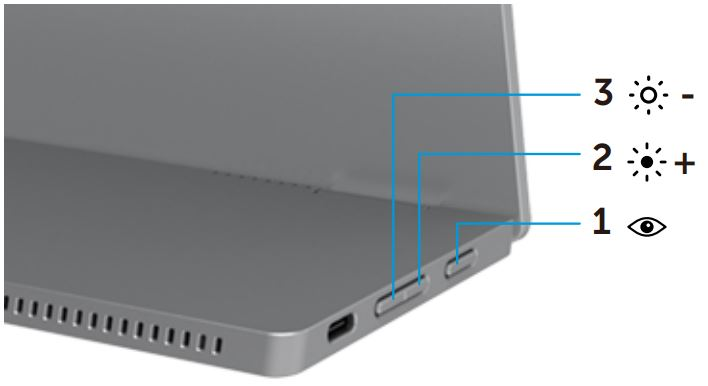
Dell portable models include basic On‑Screen Display (OSD) controls for brightness and ComfortView blue‑light reduction. Use the side buttons to raise or lower brightness or toggle ComfortView for eye comfort.
To access the on-screen display (OSD) menu, press Button 1 on the left of the monitor.
Dell P1424H front panel buttons
6. Troubleshooting “No Signal” or Blank Screen
Ensure the USB‑C port supports video. Not all USB‑C ports do.
Try another certified USB‑C cable. Use Dell-approved cables.
Run Dell self‑test if screen stays dark with cable unplugged — you should see a floating dialog box if self‑test works Dell.
Update graphics drivers from Dell’s Drivers & Downloads page or GPU maker website.
For more help with accessories like portable monitor mounts or stands, see our guide on “[portable monitor stands]” which covers setup, portable monitor stand options, and VESA mounting solutions.
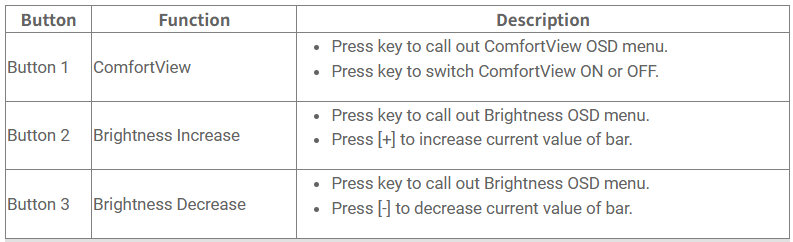
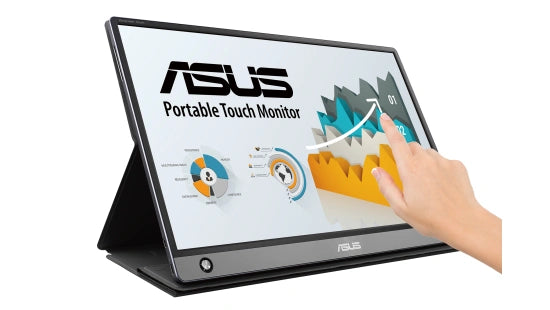
ASUS portable monitor brightness adjustment can be simple—even for beginners. If you’ve never used a portable display before, this guide will walk you through each step clearly. We’ll cover the process in detail and offer tips.
1. Overview of ASUS Portable Monitor and Included Accessories
An ASUS portable monitor typically includes the ZenScreen series or gaming models like the ROG Strix XG17AHPE (TechRadar). Packages usually come with a smart cover or folding stand and a USB‑C cable.Accessories help you set up and protect the screen.
2. Unboxing: Locating the Stand / Smart Cover
When unboxing your ASUS portable monitor, look for the foldable cover or kick‑stand built into the back. It doubles as a screen stand and case. You might also find a small tripod or magnetic smart cover similar to models from ThinkVision or Acer. Keep your brand manual handy for reference.
3. Step‑by‑Step Unfolding and Positioning the Stand
To set up the stand: unfold the smart cover or rotate the kick‑stand until it snaps into place. Position the screen upright on a flat surface. For stability, use both hands and place the folded cover firmly. Similar steps apply to other portable monitor stands like Arzopa or Lepow models.
4. Adjusting Angle and Orientation for Optimal Stability
Find the ideal angle by gently tilting the unit and adjusting the stand. Ensure it’s stable and not wobbling. If the angle is too steep, the display may collapse—so avoid over‑stretching. Travel‑friendly brands such as forhelp portable monitor or AOC portable monitor often include sturdy travel cases to protect the stand.
5. How to Adjust Brightness on ASUS Portable Monitor Easily
This is the hot topic about how to adjust brightness on ASUS portable monitor:
On older ASUS USB‑C models like MB168B, MB165B or MB16AHT, brightness must be set via DisplayWidget software, not through the on‑screen display (OSD) .
Installation: Go to the ASUS Download Center → find your model → download ASUS DisplayWidget → install it, open the app, click the Image tab, then adjust brightness using the slider.
*Adjust the brightness only for monitors with the DisplayWidget function; do not adjust the brightness through the OSD for regular monitors.*
For models with hardware buttons (e.g. MB166C, MB16QHG), you can use the built‑in button controls. Use the menu button or shortcut key to navigate to Brightness in the OSD, then press up/down buttons to set 0–100 range (Geizhals).
If you’d like a visual walkthrough, here is a helpful tutorial:
6. Tips to Avoid Wobbling or Collapse
To keep things stable:
Always unfold the stand fully.
Place on a firm, even surface.
For travel, store in a padded portable monitor case or smart cover (many ASUS and Arzopa models include these).
When adjusting angle or brightness, hold the base steady.
7. Best Practices for Travel and Case Protection
When packing:
Fold in smart cover or stand, then seal it into a slim sleeve.
Use the included carrying pouch from ASUS or alternative from Acer/HP/Dell if provided.
Avoid stacking heavy items on top of the monitor.
Brands like Arzopa and Lepow often offer matte screen film or protective sleeves that also reduce glare.
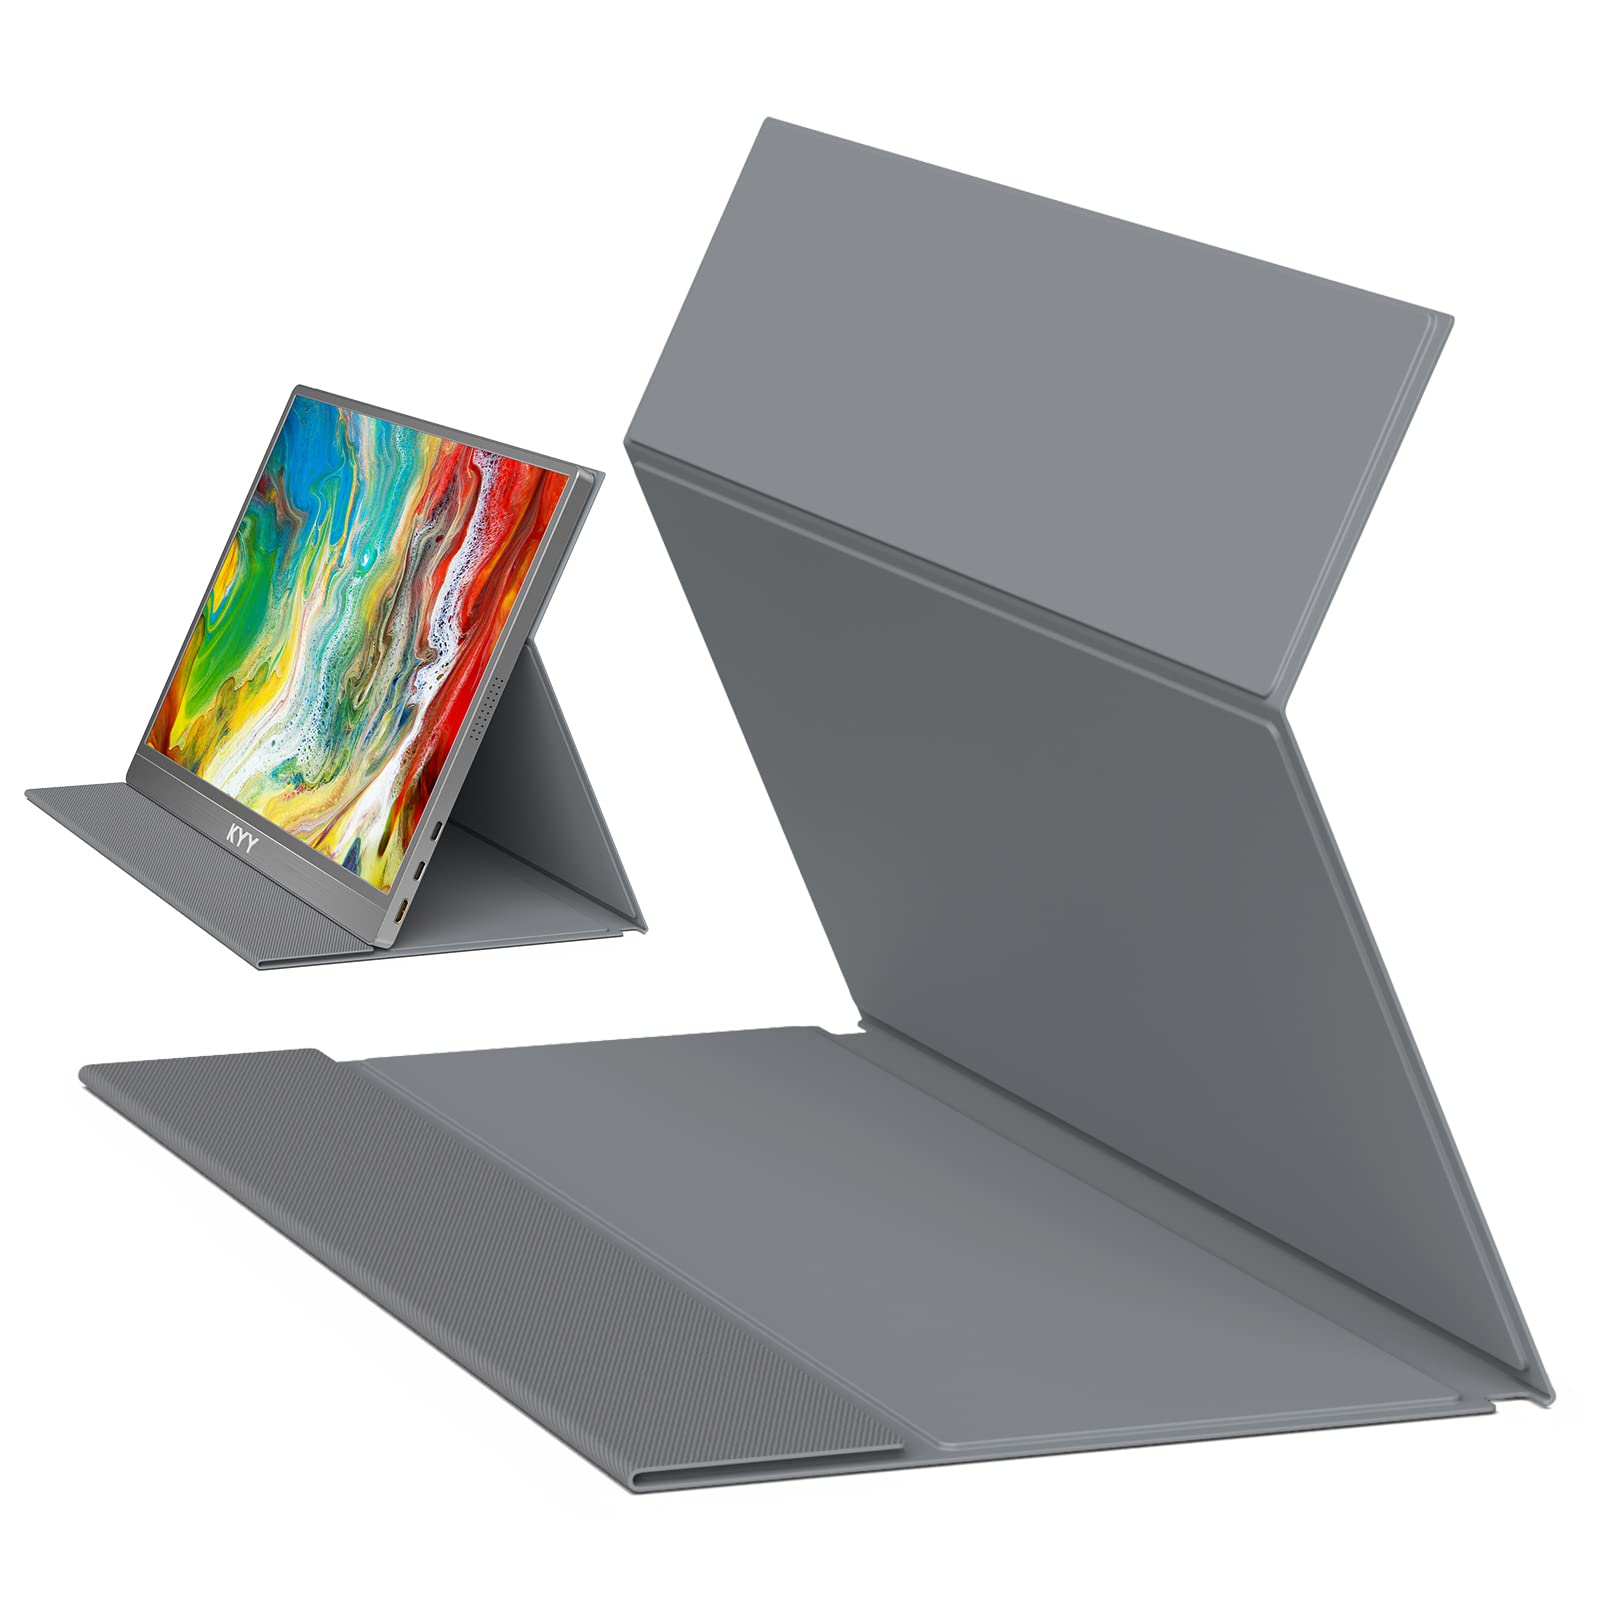
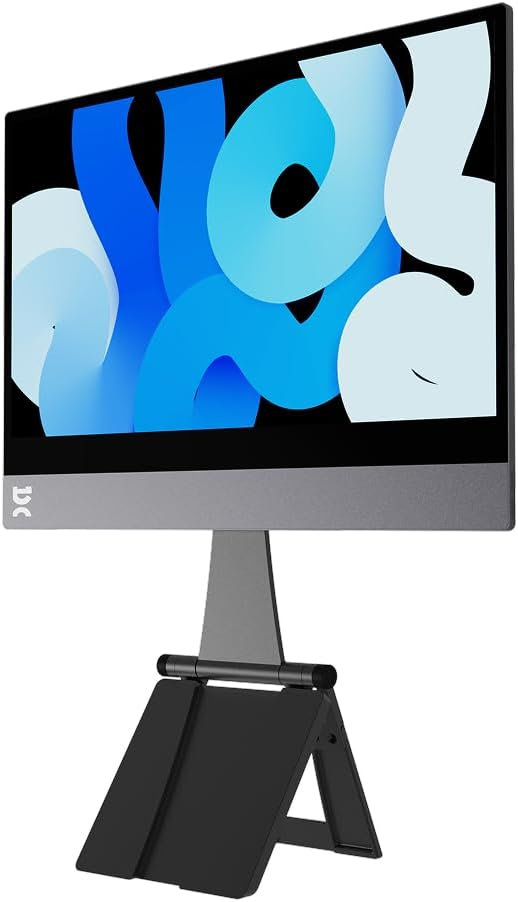
KYY portable monitor models like the K3, K3‑1, and K3‑2 include a smart cover which doubles as a portable monitor stand. In this guide, you’ll learn how to set up the stand easily—even if you’re new to portable monitors.
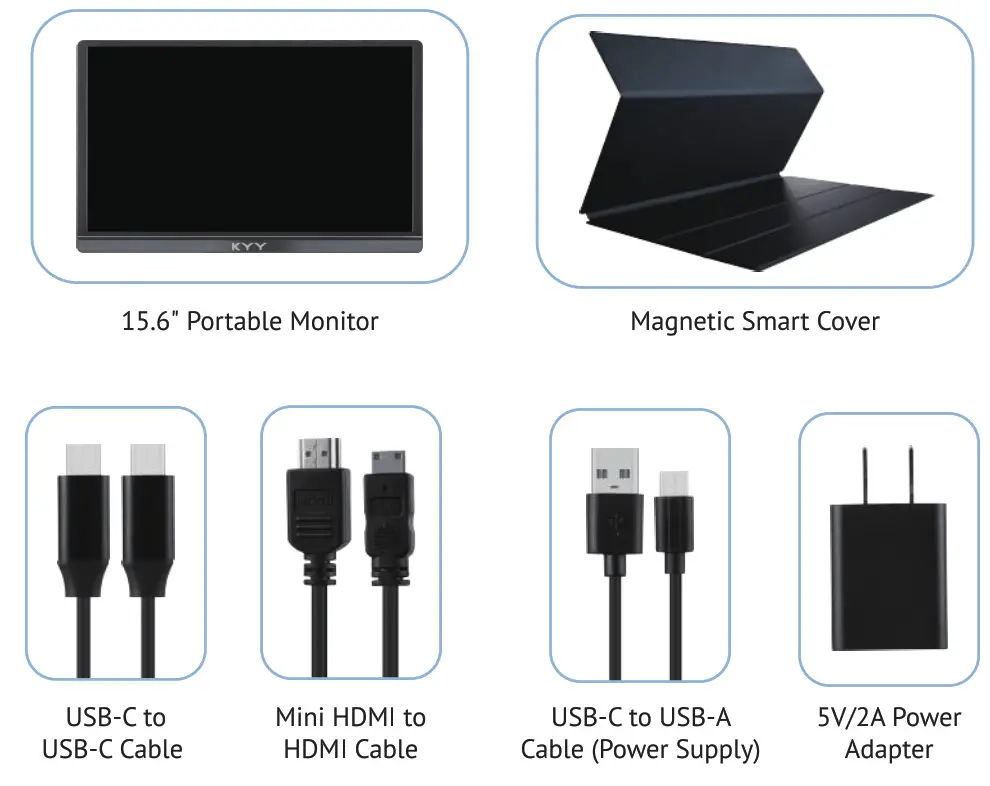
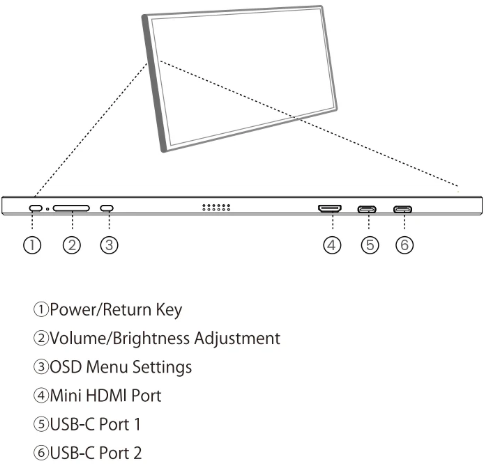
Required cables and power sources for KYY Portable Monitor Stand
You need:
Smart cover/stand (included)
USB‑C to USB‑C cable or USB‑C to USB‑A adapter (to power and transmit data)
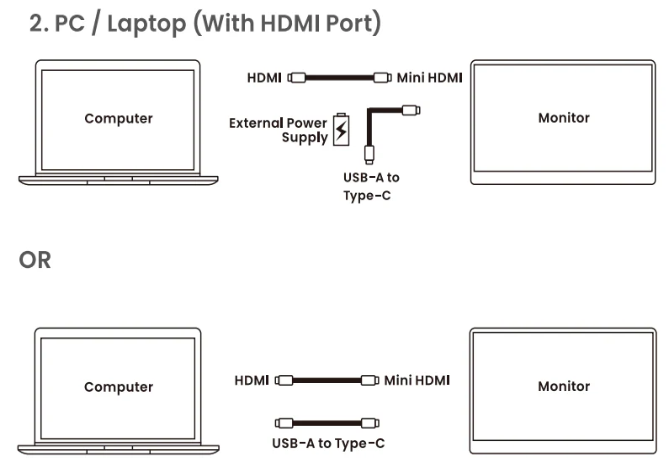
Mini‑HDMI to HDMI cable if using HDMI output A full‑function USB‑C port or external power supply (5 V/2A or more) is essential.
Steps to connect via USB‑C or HDMI using KYY Portable Monitor Stand
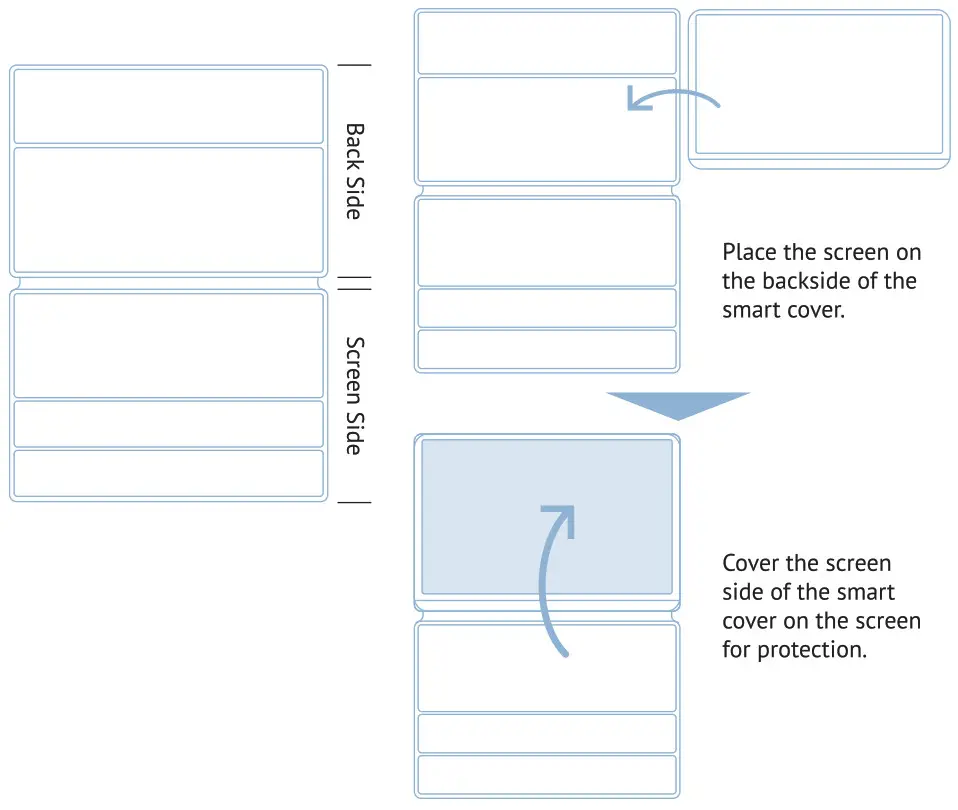
Attach the magnetic smart cover to the back of your KYY monitor (K3‑series) .
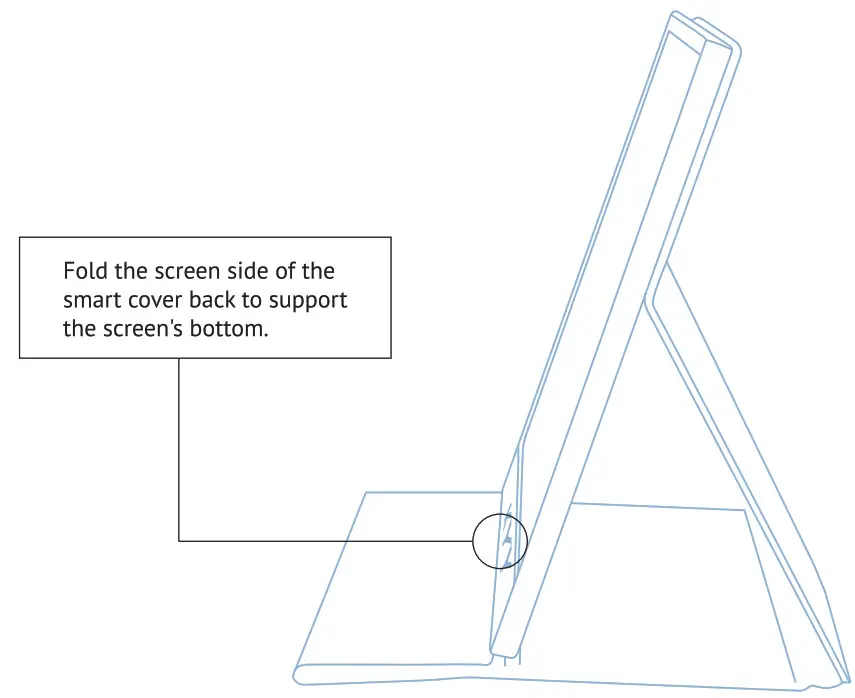
Fold the cover into a triangle. Use grooves on the bottom edge for angle adjustment .
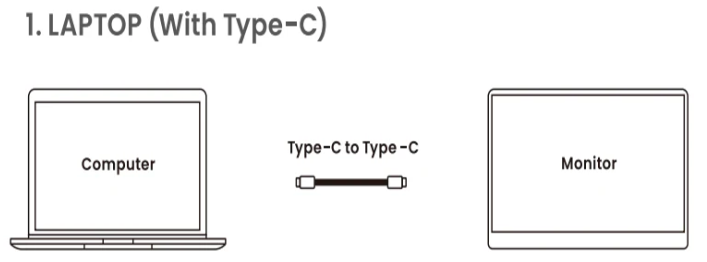
If using USB‑C single cable, plug it into the monitor’s full‑function USB‑C port and into your laptop’s USB‑C port that supports video out.
If your laptop lacks full‑function USB‑C, connect a USB‑C to USB‑A adapter for power, then the USB‑C or mini‑HDMI cable for video.
Ensure power supply is plugged in before HDMI or USB video cable to avoid startup issues.
Use the smart cover to make the monitor stands at a proper viewing angle.
This video clearly shows how to fold the smart cover into a stable stand.
Adjusting display settings in Windows, macOS
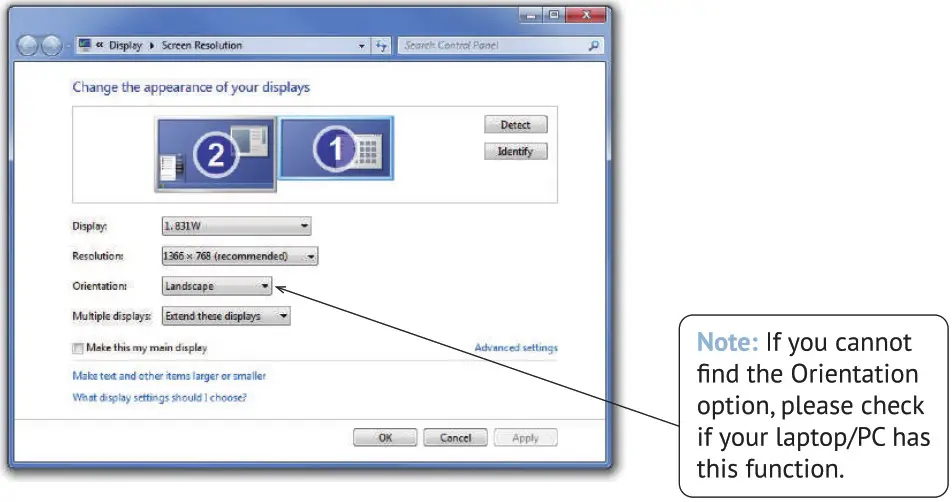
Windows 10/11: Right‑click desktop → Display Settings → select extended or mirrored mode → set orientation/scale.
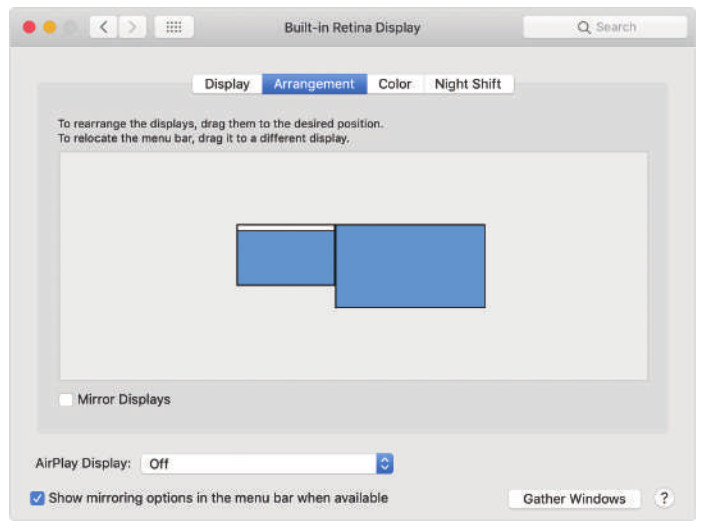
macOS: Apple menu → System Settings → Displays → Arrangement → drag monitors into position. Choose portrait or landscape orientation as needed.
Troubleshooting common connection issues with KYY Portable Monitor Stand
No signal or “power saving”: Check cable types, ensure full‑function USB‑C port, and that power adapter is supplying. HDMI input does not power the monitor.
Brightness or volume locked: Turn off HDR mode, DCR mode, or scene/ECO auto modes in OSD menu to regain brightness/volume control.
Screen too light or dark: Reset display settings in OSD or on Windows/macOS.
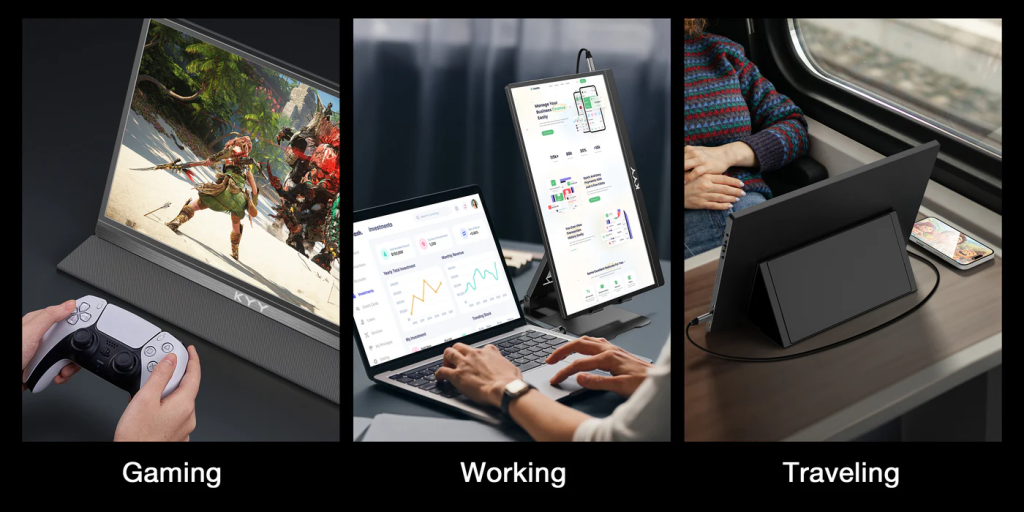
Use cases: dual‑screen productivity, presentations, on‑the‑go work
Laptop second screen: Pair your laptop with the KYY portable monitor for dual‑screen productivity, ideal for spreadsheets, coding, or design.
Presentations: Fold the cover so the monitor stands upright, great for sharing slides or documents.
On‑the‑go work: At coffee shops, co‑working spaces, or remote locations, carry the slim monitor with built‑in stand and connect in moments.
To explore more information about portable monitor stand, check out our previous article here.
Portable monitor stands are essential tools for people who use a portable monitor. If you’re new to stand setups, this article introduces different stand types, ergonomic setups, and brand tips. You’ll also learn how to align your laptop and monitor and even install in a car.
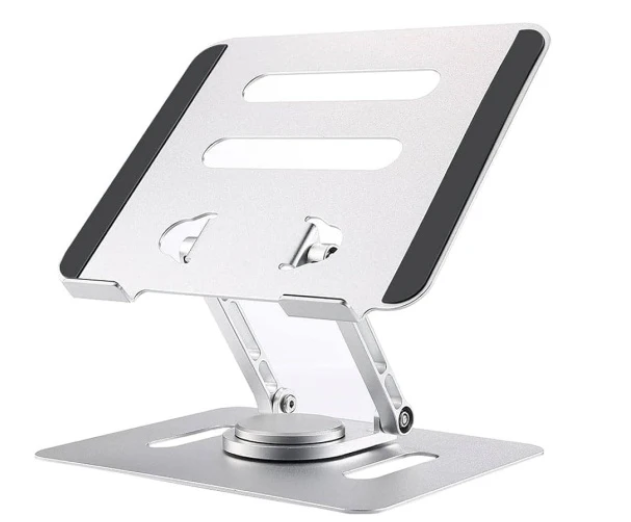
1. Types of portable monitor stands: Foldable, Tripod, Wheeled & VESA
There are a few portable monitor stand designs:
Foldable stands collapse flat for travel. They are light but stable.
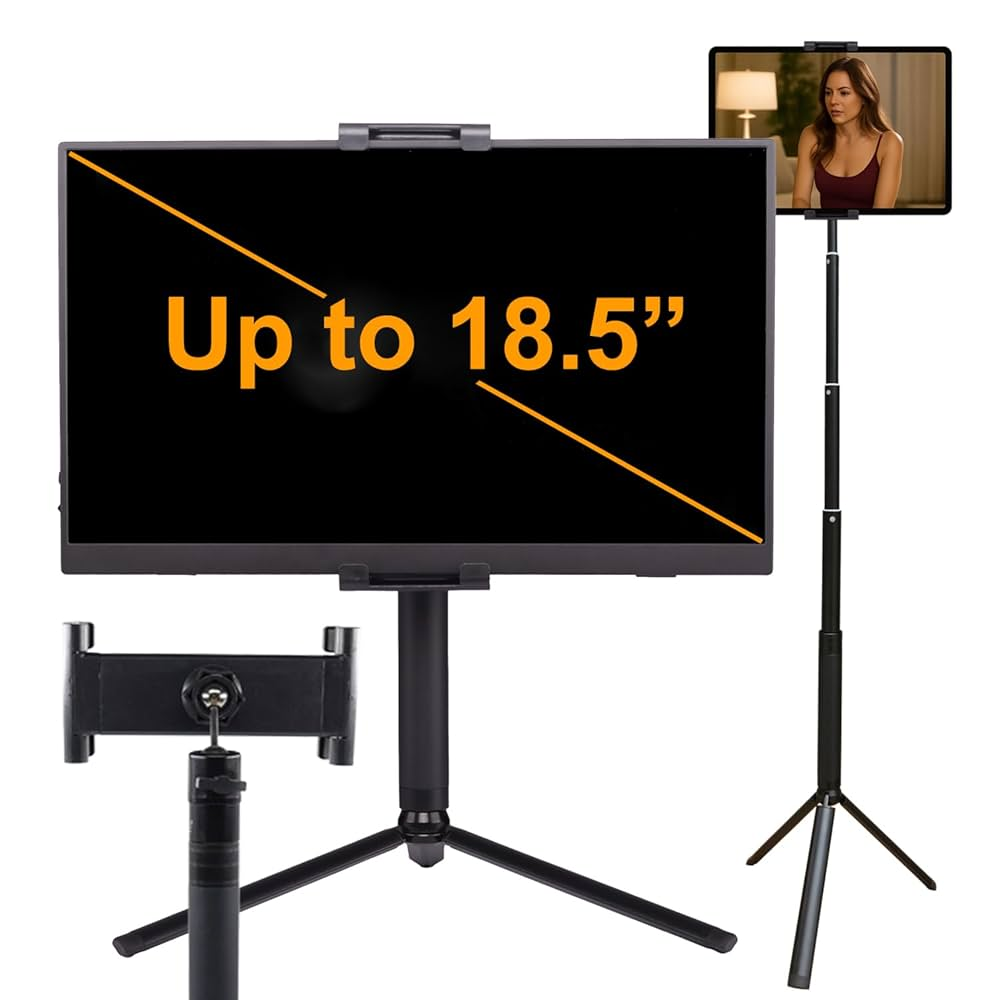
Tripod types use small legs and telescoping poles. Great for adjustable height and tilt. (arzopa.com)
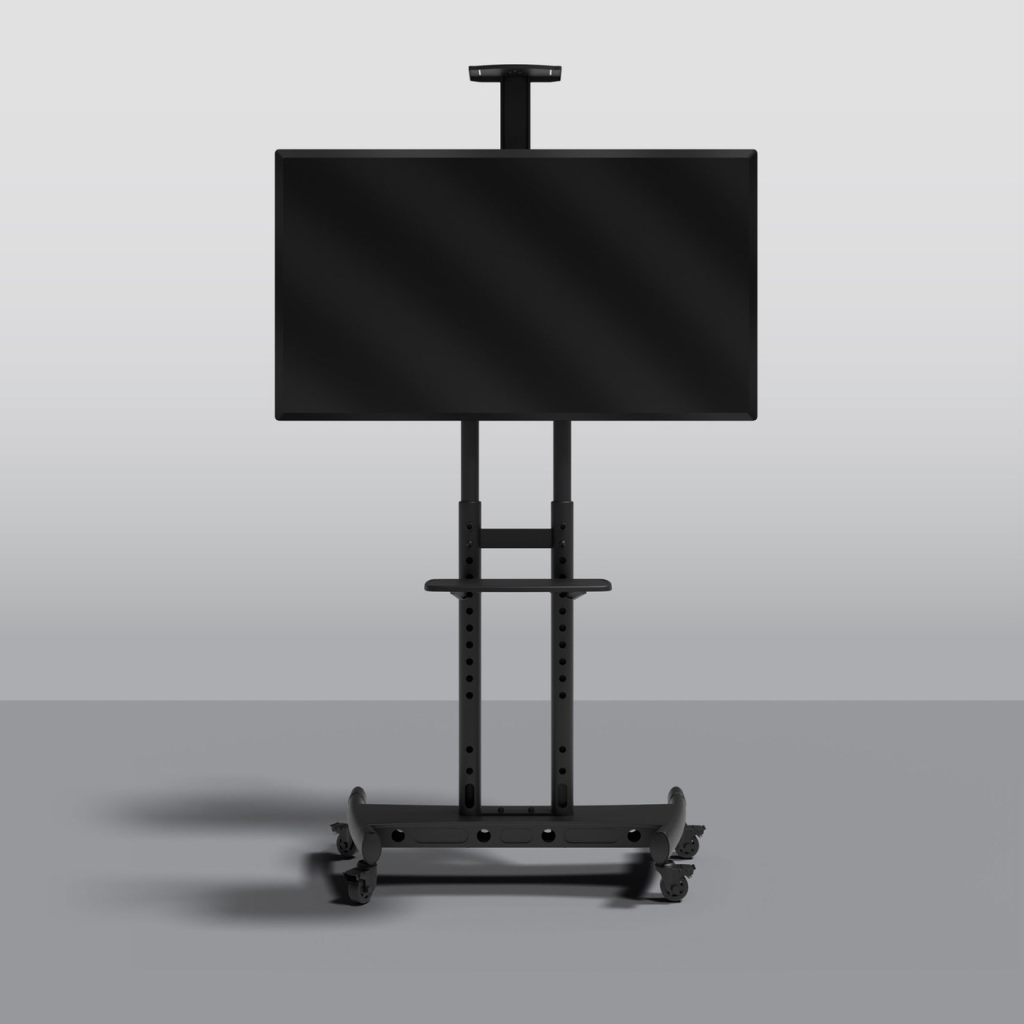
Wheeled stand designs (floor or desk wheels) let you move a monitor easily in office or home spaces.
VESA mounts support any VESA‑compatible portable monitor and attach securely. These often mimic traditional monitor stands.
Each style suits different situations: compact travel, adjustable height, easy mobility, or standardized mounting.
2. Weight Capacity Comparison Chart for portable monitor stands
Here’s a simple comparison:
Stand Type
Typical Weight Capacity
Foldable
~1–3 lb (0.5–1.5 kg)
Tripod
~3–5 lb (1.5–2.3 kg)
Wheeled floor
Up to ~10 lb (4.5 kg)
VESA compatible
5–15 lb depending on mount
Lightweight stands are perfect for most portable monitors like Arzopa, Lepow, Uperfect, Lenovo ThinkVision M14, Dell, HP, Acer, and ASUS. Be sure your stand supports your monitor’s weight.
3. Single vs Dual Monitor Setup Tutorials with portable monitor stands
Single monitor setup: Use a tripod or foldable stand beside your laptop. Attach via clamp or suction if supported.
Dual monitor setup: Two portable monitors on side-by‑side VESA stands or a dual‑arm tripod setup. Height must match for comfort. A tripod stand can hold one and a foldable base can hold the second. Ensure synchronizing angle and tilt.
Adjust each screen so tops align, avoiding neck strain.
4. Laptop + Monitor Ergonomic Alignment using portable monitor stands
Align your laptop screen and portable monitor for good posture:
Place both displays at eye level using stand height adjustment.
Position the laptop portable monitor slightly left or right, so you can rotate toward the main focus.
Use adjustable tilt to reduce glare from light.
This reduces eye strain and back pain. Ergonomic guides often recommend monitor stands like those for Lepow portable monitor as helpful tools. (arzopa.com, arzopa.com, UPERFECT, reddit.com)
5. Car Mount Integration Solutions for portable monitor stands
Yes, you can use portable monitor stands in a car:
Mount via clamp to seat‑back trays or use a tripod base on a flat seat.
Choose lightweight foldable tripod stands that can sit securely.
Make sure the stand and monitor are secured using belts or straps, especially when car moves.
This is ideal for watching media or mobile setup in RVs or vans.
6. Portable Triple Screen Configurations with stands
Setting up three portable monitors needs more support:
Use two tripod stands at sides, and a central VESA mount on a small desk clamp or wheeled stand.
Ensure each mounted unit matches in height and angle.
Manage cables with clips and choose stands that fold flat for travel.
This setup is more advanced but powerful for trading, coding, or design workflows.
7. Brand‑Specific Guides for Uperfect & Arzopa with portable monitor stands
Uperfect
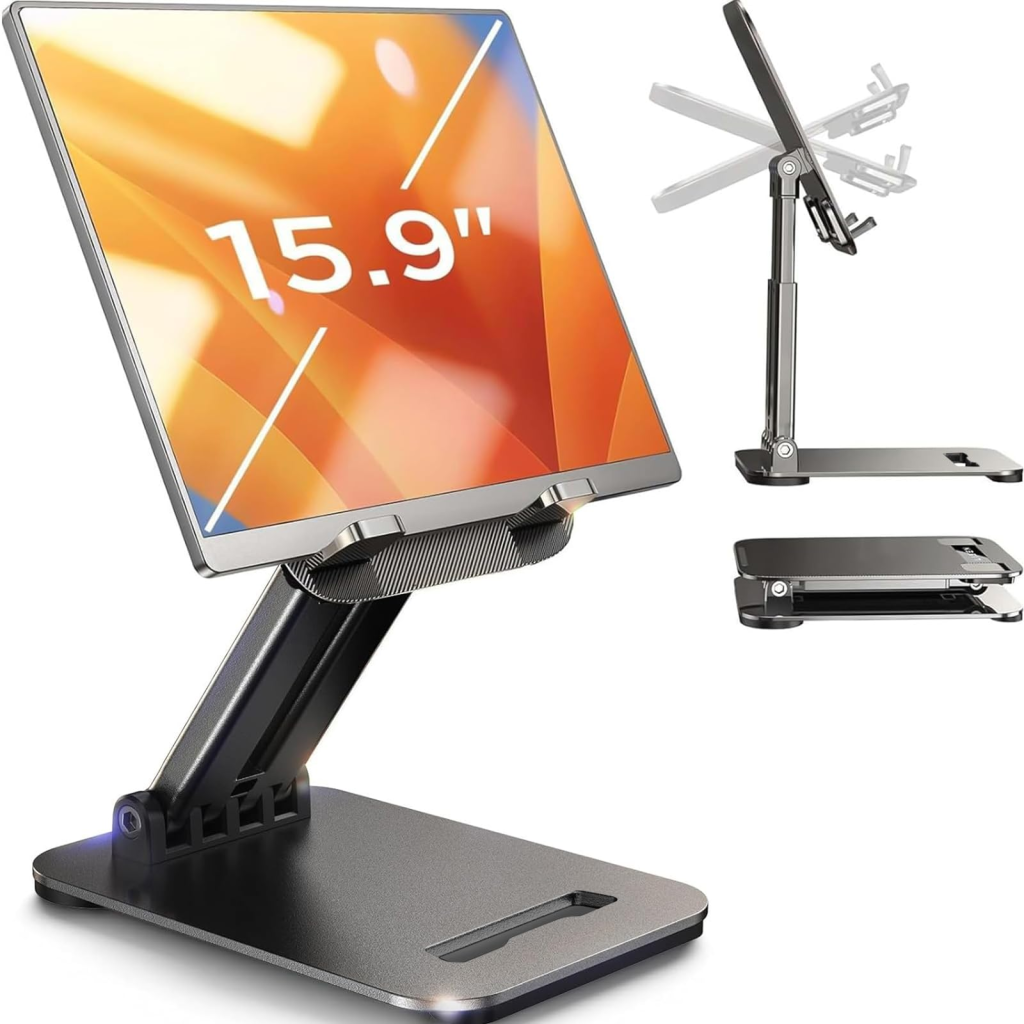
The Uperfect portable monitor stand & mount supports monitors and tablets between 5.9–9.56″. It’s adjustable for height and tilt and perfect for travel with UStand. (UPERFECT)
Arzopa
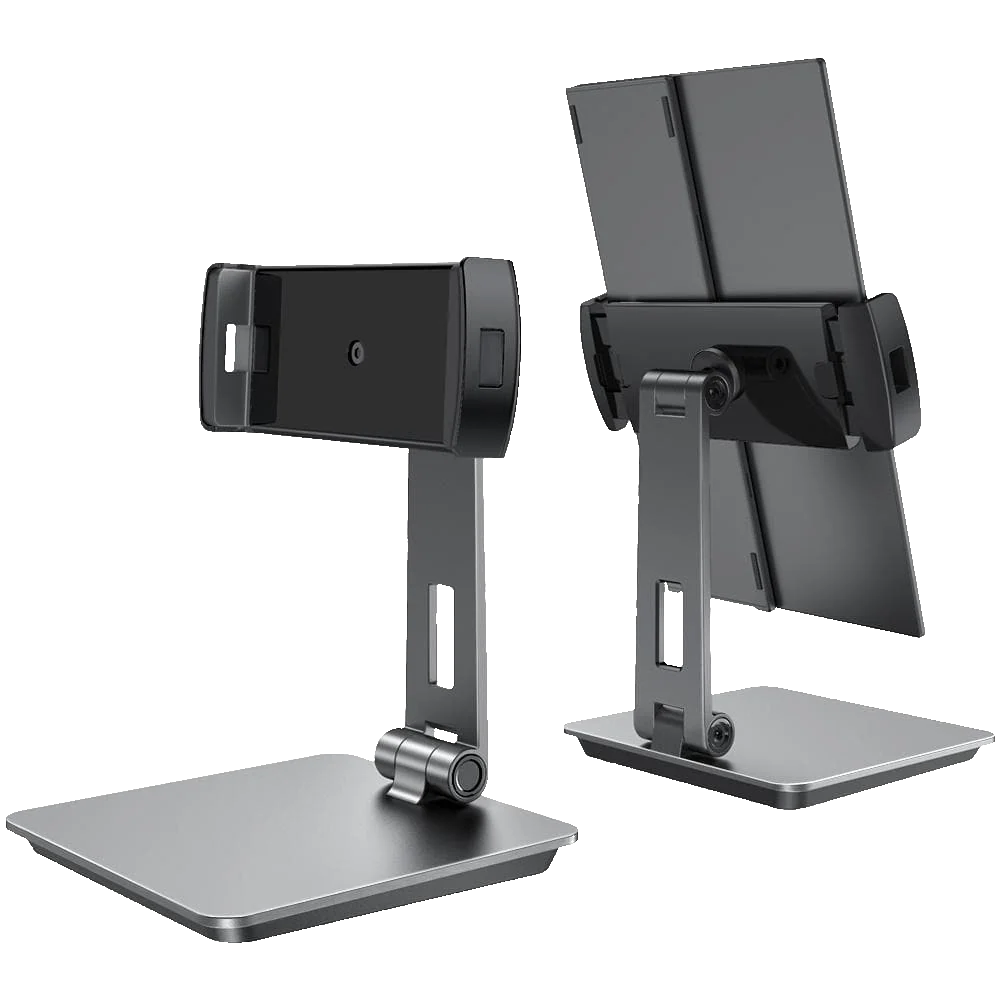
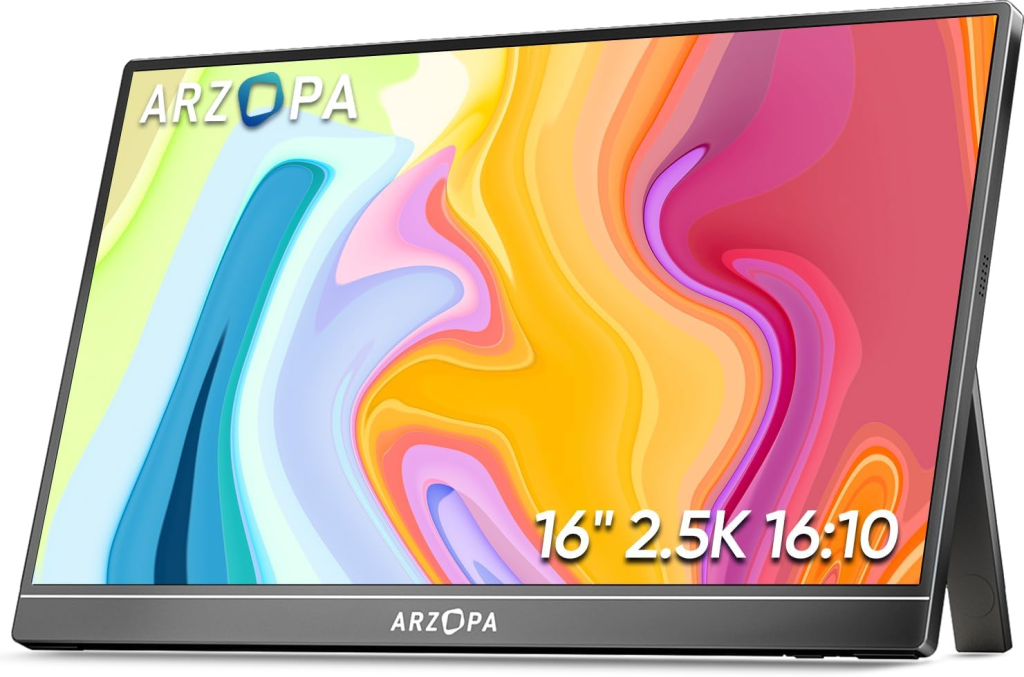
Arzopa portable monitor often includes a slim desktop stand. The ARZOPA A1 Gamut Slim Stand is lightweight and foldable for travel. It supports up to 15.6″ monitors with strong stability. (亚马逊, arzopa.com)
Use these stands with Arzopa monitors like the Z1RC model. Users report easy setup and productivity gains. (lifewire.com) Both brands are trusted for their good ergonomics and portability.
8. Maintenance & Travel Packing Tips for portable monitor stands
Disassemble foldable stands: store in protective sleeves.
Keep joints tightened and clean.
Wrap in soft pouch or case with foam padding.
Avoid stacking heavy items above folded stands.
Wipe connectors and clamp pads to remove dust or debris before reuse.
A clean, well‑stored stand lasts longer and stays stable.
Conclusion
Portable monitor stands make it easy to work or play anywhere. Whether you choose a foldable, tripod, wheeled, or VESA mount style, make sure it matches your monitor’s size and purpose. Brands like Arzopa, Uperfect, Lepow, Lenovo, Dell, HP, Acer, and ASUS all offer models that fit well with these stands. Follow ergonomic setup tips and pack your gear correctly for stress‑free mobility.
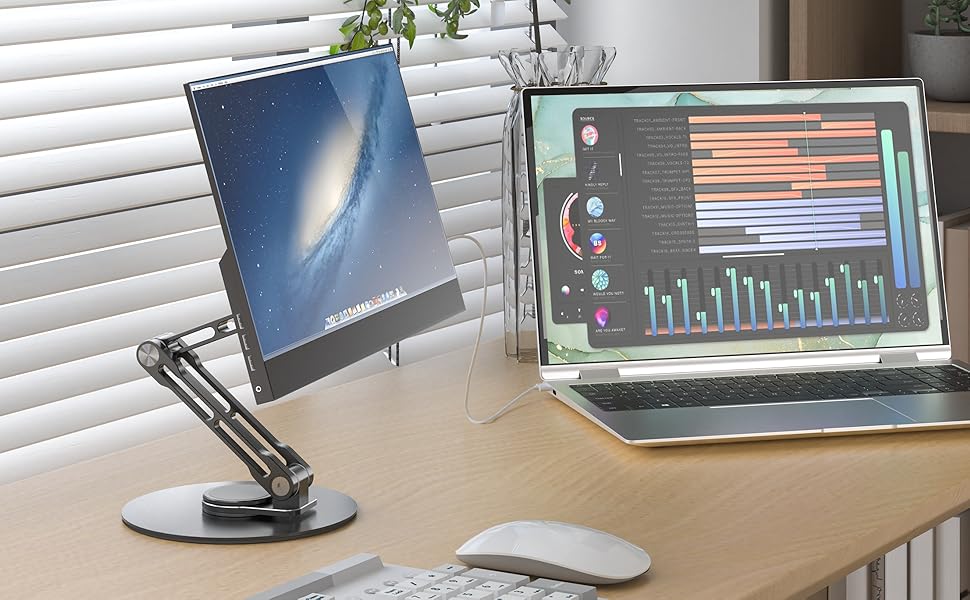
Why portable monitor vesa mount Enhances Portability
A portable monitor VESA mount dramatically improves stability and flexibility. Instead of leaning the monitor on a case or desk, mounting keeps it secure and frees up space. It’s ideal for portable monitor stand setups and suited for brands like ForHelp, Arzopa, Lepow, Lenovo, Dell, HP, Acer, ASUS, ThinkVision.
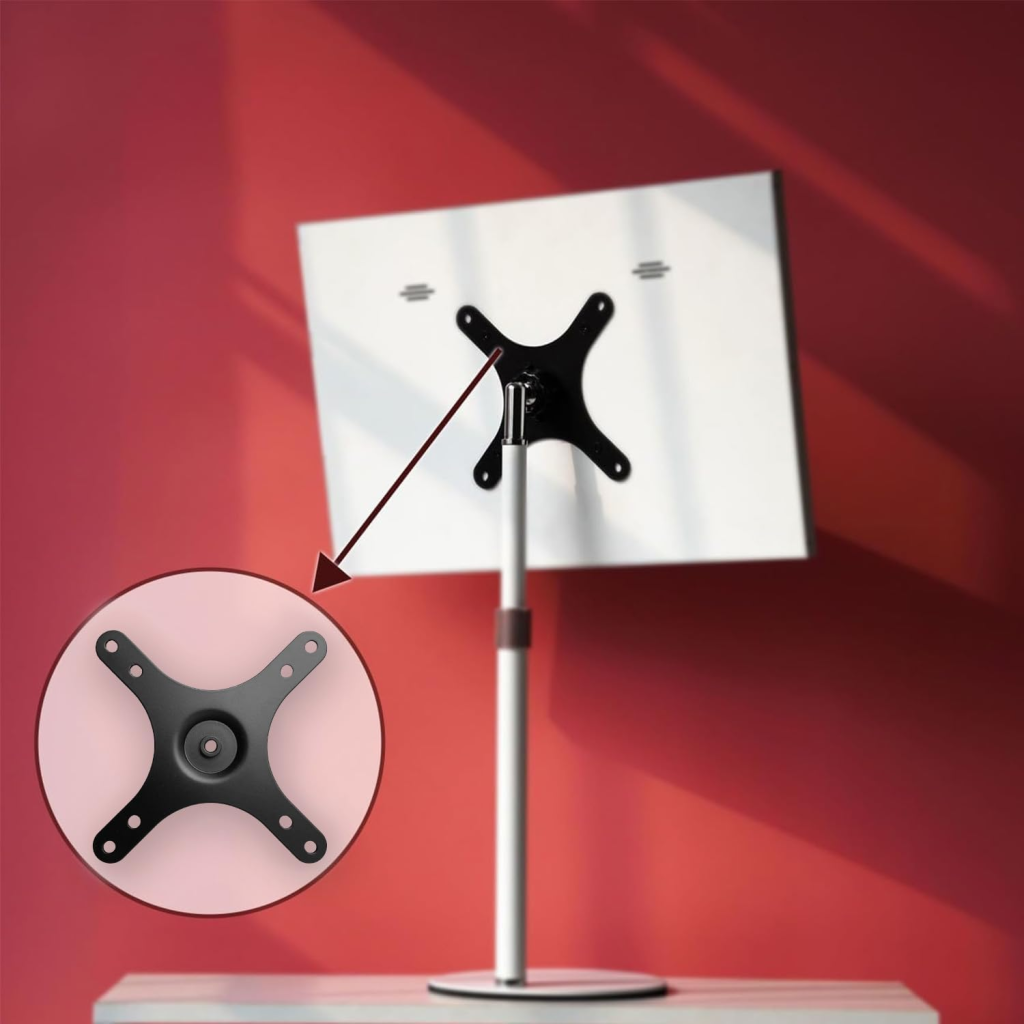
Adapter Plate Selection Guide
Many portable monitors lack native VESA holes. You may need a VESA adapter plate to attach them to standard 75×75 mm or 100×100 mm arms.
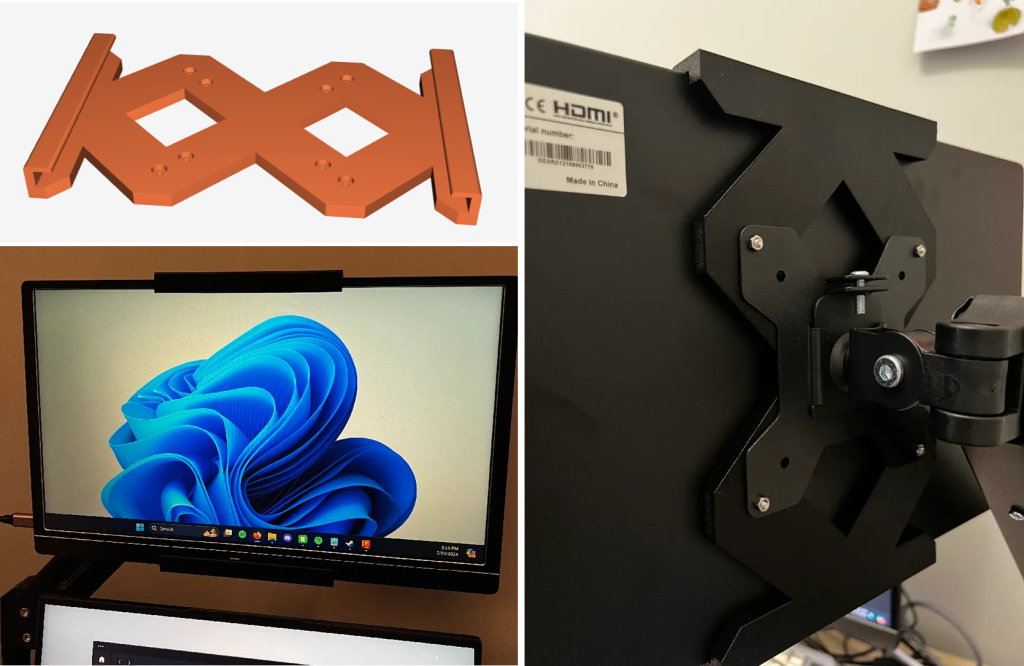
Products such as the Kado VESA mounting adapter plate work universally.
Also 3D‑printed mounts like on Arzopa S1 monitors fit using M4x10 screws. This ensures compatibility with VESA‑compliant arms.
Step‑by‑Step Arm Installation Process Using a portable monitor vesa mount
Confirm your portable monitor’s VESA pattern matches the plate or arm (e.g. MIS‑D 75 × 75 or 100 × 100) .
Attach the adapter to the monitor’s back using correct screws.
Mount the plate onto a monitor arm or desk clamp arm.
Secure and tighten all joints.
Route cables cleanly and test tilt/pivot. For detailed visuals, you can consult step‑by‑step VESA install videos.
Ergonomic Positioning for Neck/Back Health
Mounting ensures proper screen height, distance, and angle. Keep the top of the screen at eye level, about arm’s length away. Tilt slightly upward to reduce neck strain. Use dual‑arm or multi‑arm setups to reduce head motion. Avoid keeping your portable monitor at an unnatural angle. Regular adjustments help prevent stiff necks.
Weight Limit Testing Across Brands with portable monitor vesa mount
Most standard arms support up to 30 lbs and screens up to 22″ (MIS‑D). Portable monitors are usually under 2 lbs, well within limits. Still, test tilt stability with brands like ForHelp, Arzopa, HP portable monitor, Acer, ASUS, Lepow, ThinkVision M14, to avoid sagging.
Magnetic Mount Integration Tips for portable monitor vesa mount
Some portable monitors like ForHelp or Arzopa include magnetic smart covers. Those can double as kickstands. But for secure workstation setups, use a VESA adapter instead of relying solely on magnets. The hard metal housing connects better to plates and avoids slipping.
Travel Solutions: Foldable VESA Options for portable monitor vesa mount
Foldable VESA‑ready arms and adapter plates are great for travel. Look for lightweight aluminum adapter plates or foldable desk‑clamp arms that collapse. Brands like Acer or ASUS sometimes bundle carrying cases. A plate like Kado or custom Arzopa‑fit version is compact and packs easily .
Dell, HP, Acer, ASUS portable monitors: many models support VESA mounting or third‑party adapters; search via Amazon for portable monitor with VESA mount adapter.
For readers wanting more ideas on portable monitor usage, see our guide on portable monitor stand essentials, covering travel, foldable cases, and magnetic stands.
This guide helps you mount any portable monitor—whether best portable monitor from Arzopa, ForHelp, Lenovo, Dell, HP, Acer, or ASUS—onto a VESA arm. It’s beginner‑friendly, ergonomic and portable.
Enjoy comfort and flexibility with your portable display setup!
When shopping for the best portable monitor, it’s essential to know which features matter most so you end up with a display that’s truly useful and not just flashy.
Introduction
The best portable monitor delivers excellent image quality, connectivity, portability, and usability. Whether you’re working remotely, gaming, designing, or traveling, this guide helps you choose wisely.
What is a portable monitor? How do portable monitors work?
Like any other monitor, a portable monitor has a screen that can be connected to a laptop, desktop PC, gaming console or many other devices. The key difference is that, like the display on a laptop, a portable monitor is exceptionally thin, making it easy to take with you.
You can set up your portable monitor almost anywhere because it has a kickstand. Some portable monitors have a kickstand, which lets you use them in different ways. You can use them in portrait or landscape mode. Their stepless hinge lets you position the display at a wide range of viewing angles, so you can align the portable monitor exactly with the screen of your laptop.
Brightness above 400 nits ensures decent visibility outdoors or in bright rooms.
For resolution, 1080p (Full HD) is often enough on a 15.6″ display, since pixel density appears sharp. If you need more detail—for video editing or creative work—a 2K or even 4K OLED panel may be worth the price.
OLED portable monitor models like the Innocn 15A1F or ViewSonic VP16‑OLED offer rich colors and contrast, ideal for creators.
Screen Size, Weight & Portability
Portable screen sizes range typically from 13″ to 17″. A 15.6″ model offers the best balance: large enough for productivity yet still fitting into most backpacks.
Weight matters. Choose under 1.5 lb for maximum mobility. Up to 2.5 lb is acceptable if you want extra build quality or features.
Cable and Connectivity Options
Ensure the monitor supports USB-C with DisplayPort Alternate Mode and Power Delivery for one‑cable video and power. Choose models that also include HDMI or mini‑HDMI to connect legacy devices, such as consoles or older laptops.
Some monitors offer DisplayLink support, which lets you use USB‑A ports. However, native Alt‑Mode USB‑C is simpler and more reliable.
Stand Design & Usability Features
Built‑in kickstands or bundled magnetic flip cases should be stable and adjustable. Avoid flimsy clip‑on folios—they often compromise stability and viewing angles.
A stand that supports both landscape and portrait orientation is helpful, especially for coding or document review.
Durable accessories like a carrying case and possible VESA mount compatibility boost portability and desk setup flexibility.
Ergonomics & Extra Features
Monitors with anti‑glare coatings, low‑blue‑light mode, and flicker‑free tech reduce eye strain, especially during long sessions.
If you need touchscreen input or stylus support—check if it’s compatible, especially for Mac—mouse interactions alone might not be enough.
Use Case Scenarios
Scenario
Key Features
Example Models
Travel & Productivity
Lightweight, USB‑C single cable
Lenovo ThinkVision M14t Gen 2
Creative or Color‑Sensitive Work
OLED or wide‑gamut panel
Innocn 15A1F, ViewSonic VP16‑OLED
Gaming on the Go
High refresh rate (≥144 Hz), battery built‑in
Asus ROG XG17AHPE, ViewSonic VX1755
Recommended Models
Lenovo ThinkVision M14t Gen 2
Innocn 15A1F, ViewSonic VP16‑OLED
Asus ROG XG17AHPE, ViewSonic VX1755
Why These Features Matter
The combination of good brightness, accurate color, functional stands, and correct connectivity ensures practical everyday use. Review samples to make sure you’re not getting stuck with unreliable quality from lesser-known brands .
To learn how portable monitors compare to regular displays, check our other article on best computer monitors where we cover resolution, ergonomics, and reviewing criteria links to deeper buying advice.
When hitting the road with tech gear, the question arises: are portable monitors worth it? Balancing portability and functionality is key for travelers seeking to replicate their desktop setup on the go. As someone who’s navigated cramped hotel desks and shared living spaces, I’ve tested whether these slim screens deliver on their promise—or if they’re just another travel hassle.
The Case for Portable Monitors
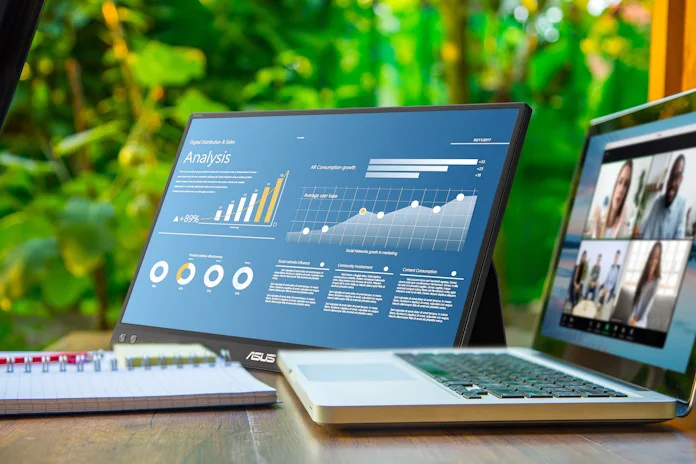
Modern portable monitors, like models from ViewSonic, ASUS, and Lenovo, pack full-sized functionality into frames slim enough to slide into a standard messenger bag. Most weigh under 2 lbs and offer 1080p IPS displays with brightness levels matching office monitors, making them ideal for remote work. Brands like Arzopa and Innocn even offer OLED portable monitors for vibrant color accuracy, while gaming-focused options such as 144Hz ASUS ROG models cater to on-the-go players.
Setup is typically plug-and-play: USB-C portable monitors draw power and data from a single cable, compatible with laptops, smartphones, and even gaming consoles like the Xbox Series S or PS5. For MacBook Pro users, specific models like the Best Portable Monitor for MacBook Pro (2025 Picks) optimize for Apple’s ecosystem, while USB Type-C connectivity ensures universal compatibility.
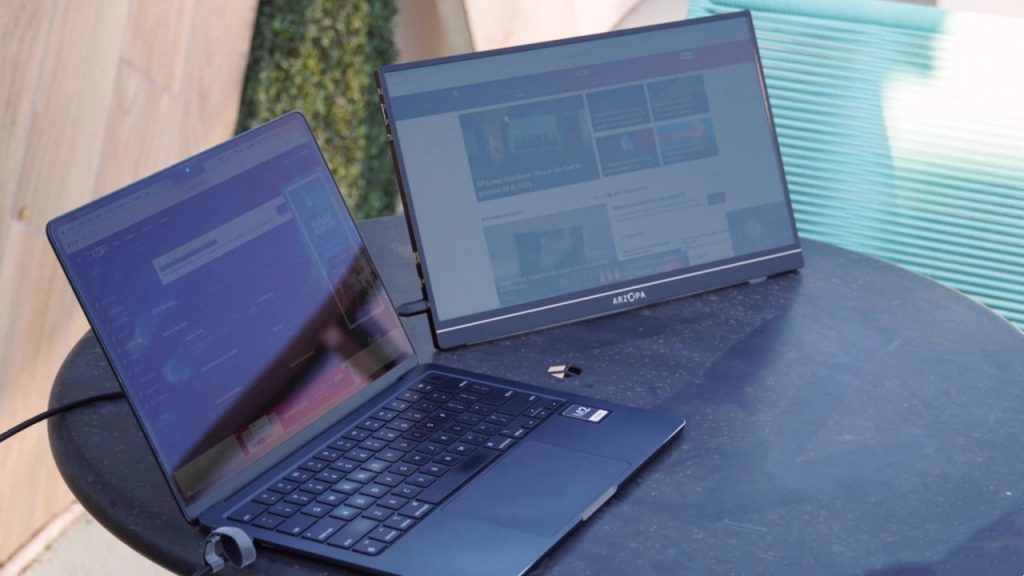
No device is perfect, and portable monitors have their drawbacks. The Arzopa A1 Gamut Slim I tested ($100-$150) exemplifies this: its 15.6-inch anti-glare screen impressed with clarity, but the flimsy magnetic cover/stand wobbled at the slightest touch. Upgrading to models with built-in kickstands (like the AOC portable monitor or KYY portable monitor) solves stability issues but adds cost.
Bulk is another concern. A 17-inch portable monitor, while immersive, may strain backpack space, whereas 13-15 inch options strike a better balance. Battery-powered models exist but often sacrifice brightness, and some users report “portable monitor no signal” issues with non-standard cables—easily fixed with a reliable USB-C to USB-C cable.
Unexpected Perks Beyond Travel
Portable monitors shine beyond travel. As a remote worker sharing space, I’ve repurposed my Arzopa as a secondary screen at the kitchen counter, avoiding office congestion. For Mac mini or MacBook Air M2 users, a portable second monitor transforms compact setups into productivity hubs. Gamers, too, benefit: the 4K portable gaming monitor options deliver console-like experiences on the road, though the “portable monitor for Xbox” niche remains limited compared to laptop-focused models.
Alternatives to Consider
If portability is paramount, laptop monitor extenders like Mobile Pixels’ Duex Plus attach directly to your screen, eliminating extra bulk. Tablets with Sidecar (iPad) or Duet Display offer flexibility but at the cost of screen real estate. For tight budgets, the MNN portable monitor or Innocn portable monitor under $100 provide basic functionality, though durability varies.
Final Verdict
So, are portable monitors worth it? For frequent travelers or anyone craving dual-screen productivity without a desktop, yes—especially if you prioritize models with sturdy stands and USB-C connectivity. The Arzopa A1 Gamut Slim works for budget buyers, but investing in the best portable monitor for your needs (OLED, gaming-focused, or Mac-optimized) pays dividends. Just remember: the right case (like a portable monitor case for 15.6-inch screens) is as essential as the monitor itself.
If you’re looking to learn how to use Arzopa portable monitor effectively, you’ll appreciate its Full HD IPS display delivering vibrant colors and sharp details in a slim, lightweight design. As one of the best portable monitor options on the market, Arzopa offers versatile 4k/2k/1080p resolution and multiple connectivity options including Mini HDMI and USB-C, creating a seamless extension of your digital workspace. Mastering the setup process is key to leveraging these features fully, whether you need a portable monitor for MacBook Pro, gaming, or mobile productivity.
Initial Setup: Unpacking Your Arzopa Portable Monitor
Upon opening the box, you’ll find:
The Arzopa portable monitor
A dedicated monitor stand
Power and HDMI cables
USB-C to USB-A cable (included with select models)
Start by connecting your monitor to a power source and pressing the power button to activate it.
Adjust the stand to find your optimal viewing angle.
(explore our guide on choosing the perfect portable monitor stand for enhanced ergonomics).
The right-side control panel features a toggle button for brightness adjustment (flick up to increase) and volume control (flick down), with the power button doubling as a back button for easy navigation.
Arzopa Portable Monitor Setup with Laptop
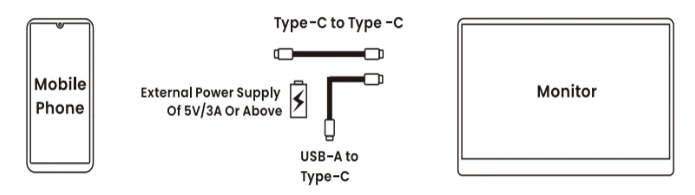
USB-C Connection
Connect your best portable monitor for laptop using a USB-C cable for a streamlined setup. This works perfectly for devices like the MacBook Pro or MacBook Air M2(discover our top 2025 picks for best portable monitor for MacBook Pro to find your perfect match.), making it an ideal portable monitor for MacBook users.
HDMI Connection
Alternatively, use an HDMI cable to connect to your PC or laptop. For devices without a full-featured USB-C port, use an HDMI to Mini HDMI adapter.
Important Note: This portable monitor doesn’t have a built-in battery. If you experience flickering or restarting when adjusting settings, ensure adequate power supply using a 5V/3A or higher adapter – a common solution for issues like “portable monitor not working with eGPU”.
Arzopa Portable Monitor Setup with Phone
Requirements:
• Compatible smartphone (iPhone or Android with USB-C/HDMI support)
• Appropriate cables (USB-C or HDMI adapter for older iPhones)
Connection Steps:
1. For phones with full-featured USB-C ports, directly connect using a USB-C cable
2. For iPhone models before iPhone 15, use a Lightning to HDMI adapter
3. Follow on-screen prompts to complete setup
4. Adjust phone display settings for optimal viewing on your portable monitor for iPhone
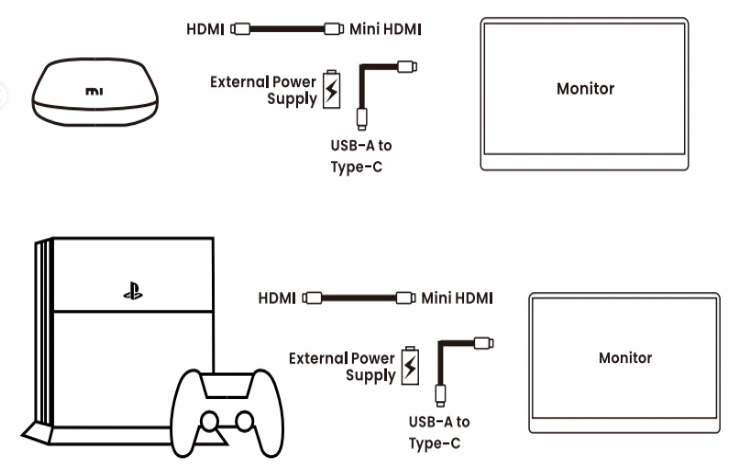
Arzopa Portable Monitor Setup with PS5/Xbox/Nintendo Switch
Transform your gaming experience with this versatile portable gaming monitor. You’ll need:
• HDMI to Mini HDMI cable
• USB-A to Type-C cable for external power (use original Nintendo Switch adapter for best results)
Setup Process:
1. Connect console to monitor using HDMI to Mini HDMI cable
2. Power the monitor with external power source
3. Adjust display settings to optimize for specific games
4. Enjoy your favorite titles on a high-quality portable monitor for Xbox or PS5
FAQs
Q: What do I need to set up my Arzopa portable monitor?
A: You’ll need the monitor, stand, power/HDMI cables, and USB-C to USB-A cable (if included). Start by connecting to power and pressing the power button.
Q: Can I use my Arzopa monitor with my MacBook Air?
A: Yes! It’s an excellent portable monitor for MacBook Air, connecting via USB-C or HDMI depending on your model.
Q: Why won’t my portable monitor turn on?
A: Check power connections, try a different outlet/adapter, and ensure you’re using a 5V/3A+ power source. Contact support if issues persist.
Q: Does this monitor have a built-in battery?
A: No, it requires external power – a common feature among most portable monitors for laptops and gaming systems.
Whether you’re setting up the best portable monitor for Mac mini or need a reliable portable second monitor for your workstation, this guide ensures you get the most from your Arzopa portable monitor setup.
In our mobile-first world, portable monitors have surged in popularity alongside laptops, essential tools for flexible workspaces, gaming on-the-go, and boosting productivity with setups like a portable second monitor for MacBook Pro. But a common question arises, especially when comparing them to their laptop cousins: Does a Portable Monitor Charge Like a Laptop? The clear answer is no. Unlike laptops which feature built-in batteries and dedicated charging ports, portable monitors operate on different power management principles.
Powering Your Portable Monitor: Charging Options Explained
Portable monitors prioritize flexibility with diverse charging methods. Unlike laptops dependent on proprietary chargers, they support:
USB-C Power Delivery: Found in top models like best portable monitor for MacBook Pro, these draw power from connected devices (laptops, phones).
Built-in Batteries: Battery portable monitors like GAEMS portable gaming monitor offer true cord-free use – perfect for travel or outdoor setups.
External Adapters/Power Banks: When devices lack sufficient output (e.g., Mac Mini, Raspberry Pi), external power bridges the gap.
Power Efficiency Insights Most 1080p portable computer monitors consume 10-15W, preserving laptop battery life. Brands like ViewSonic portable monitor and AOC portable monitors excel in energy efficiency.
Battery vs. Non-Battery Portable Monitors: Which Suits You?
Battery-Powered Models (e.g., Innoview, Arzopa portable monitor) ✓ Pros: True mobility (no outlets needed), ideal for Xbox Series S gaming or travel. Some double as power banks. ✗ Cons: Heavier/costlier (e.g., OLED portable monitor); limited runtime like 15.6-inch Arzopa Z1RC.
Non-Battery Monitors (e.g., MNN, KYY) ✓ Pros: Slim/affordable – see best portable monitor under $100 picks. No charging anxiety. ✗ Cons: Requires constant power; less suitable for car portable monitor setups.
Powering Your Portable Monitor: Charging Options Explained
Portable monitors prioritize flexibility with diverse charging methods. Unlike laptops dependent on proprietary chargers, they support:
USB-C Power Delivery: Found in top models like best portable monitor for MacBook Pro, these draw power from connected devices (laptops, phones).
Built-in Batteries: Battery portable monitors like GAEMS portable gaming monitor offer true cord-free use – perfect for travel or outdoor setups.
External Adapters/Power Banks: When devices lack sufficient output (e.g., Mac Mini, Raspberry Pi), external power bridges the gap.
Power Efficiency Insights Most 1080p portable computer monitors consume 10-15W, preserving laptop battery life. Brands like ViewSonic portable monitor and AOC portable monitors excel in energy efficiency.
Can Your Portable Monitor Charge Your Laptop?
Modern USB-C portable monitors (e.g., HP portable monitor) may charge laptops via Power Delivery, but limitations exist:
Power Delivery Support: The portable monitor and the laptop must both be able to use USB-C Power Delivery.
Power Output: The monitor must be able to provide enough power to charge the laptop properly.
Laptop Power Requirements: Laptops and high-performance machines often need more power than a portable monitor can provide.
You can charge a laptop using a portable monitor with USB-C.
Make sure your laptop can charge from a USB-C port.
Connect the USB-C cable from the monitor to your laptop.
If necessary, connect the monitor to a power source.
Look at the charging light on your laptop to see if it’s getting power.
Some portable monitors can charge laptops, but they may not provide enough power for high-performance tasks or to charge the laptop quickly.
USB-C Portable Monitors: Key Features
USB-C has completely changed how we connect and power devices, including portable monitors. Here’s what you need to know about USB-C monitors:
Versatility: USB-C can carry video, audio, data and power all through a single cable.
Power Delivery: USB-C monitors can deliver up to 100W of power, but most portable models provide less.
Compatibility: Make sure your devices can use USB-C Alt Mode for video output.
Daisy-chaining: Some USB-C monitors let you connect more than one display to them.
To make sure your USB-C monitor can power your device, follow these steps:
Check the monitor’s power output specifications.
Check what power is needed for your laptop.
Use high-quality USB-C cables that can handle the power and data transfer needed.
Portable Monitor Power Consumption and Battery Drain
Understanding your portable monitor power consumption is key to preserving laptop battery life. Essential facts:
Power Draw Insights
Standard 1080p portable computer monitors (like MNN or KYY 15.6-inch) typically use 10-15W
4K portable gaming monitors (e.g., Uperfect 17.3″) may reach 20W+
Screen brightness, resolution, and extras (speakers, portable monitor stand USB hubs) impact consumption
Laptop Battery Impact
A laptop portable monitor can increase power drain by 20-50%
Affected by your best portable monitor for MacBook Pro type and system settings Battery-saving tips for AOC portable monitors or **ViewSonic OLED models:*
Dim screens – single biggest power reducer
Lower resolution/refresh rate (e.g., 144Hz→60Hz)
Disable unused features like speakers
Pro Tip: MacBook users gain ~30% battery life using clamshell mode (laptop screen off) with your portable second monitor
Top Portable Monitors for Laptop Charging
Many portable monitors can draw power from laptops, and here are some top picks that we tested for you:
When selecting a portable monitor with built-in battery for laptop charging, prioritize these factors:
Power Delivery: Aim for 65W+ (e.g., C-Force portable monitor for MacBook Pro)
Resolution/refresh rate matching use (gaming/work)
Bonus features: speakers, USB hubs like AOC 16T15
Compatibility: Verify USB-C port support
Hot Topic: Can Portable Monitors Charge Gaming Laptops?
Gaming laptops demand serious power, making charging via portable monitors challenging. Key insights:
Gaming Laptop Power Needs
Most require 100-300W (higher for MSI portable monitor companions)
Premium models with robust GPUs often need 180W+
Portable Monitor Limitations
Standard models (KYY 15.6-inch, MNN portable monitor) deliver just 15-65W
High-end options like Uperfect 17.3 4K or ViewSonic OLED reach 90-100W Translation: Only sufficient for:
Entry-level/mid-tier gaming laptops
Steam Deck or ROG Ally handhelds
Slow charging during light use
Real-World Compatibility
Best portable gaming monitors prioritize display over power delivery
144Hz portable monitor models drain more power themselves
For Xbox Series X/PS5 setups, dedicated portable TV monitors perform better
Considerations:
Power Delivery Capability: The best portable monitors for gaming laptops are the ones with at least 90W power.
Charging vs. Power Sustainment: While a portable monitor won’t fully charge a gaming laptop, it might help keep the battery level when the laptop is in sleep mode or being used lightly.
Impact on performance: Using a portable monitor to charge your laptop may make it run slower to save power.
Extra power: You can get the best results and charge the portable monitor by using it with the laptop’s normal power adapter.
Check the specifications: Always check how much power your gaming laptop needs and compare this to the portable monitor’s capabilities. Then you can be sure it will charge your laptop properly.
Here are some examples of portable monitors that are suitable for gaming laptops:
Dell U2724DE Ultrasharp: Offers 90W power delivery
Philips Evnia 8000: Provides 90W power delivery with a large 49-inch display
It’s hard to find portable monitors that can fully support high-power gaming laptops, but the technology is improving all the time. As USB-C Power Delivery standards improve, we may see more portable monitors that can charge even the most demanding gaming laptops in the future.
Got charging issues with your laptop portable monitor? Here’s expert troubleshooting:
1. “My laptop won’t charge through the monitor!”
Ensure both devices support USB-C Power Delivery.
Verify that you’re using a high-quality USB-C cable capable of power delivery.
Check if your laptop’s USB-C port is configured to accept incoming power in the BIOS settings.
2. “Extremely slow charging – normal?”
Some monitors may not provide enough power for fast charging. Check the monitor’s power output specifications and compare them to your laptop’s requirements.
Reduce the laptop’s power consumption by lowering screen brightness or closing unnecessary applications.
3. “Can it charge gaming laptops?”
Most gaming laptops require more power than typical portable monitors can provide. However, some high-end portable monitors with 90W+ power delivery might be suitable.
Always check your gaming laptop’s power requirements before relying on a portable monitor for charging.
4. “Battery drains too fast!” Optimize with:
Lower the brightness on both displays.
Reduce the resolution or refresh rate of the portable monitor if possible.
Use your laptop in clamshell mode (internal display off) when appropriate.
Consider using a dedicated power bank for extended usage.
5.“Safe for overnight charging?”
Modern safeguards prevent overcharging
Still recommended: Unplug portable monitors with built-in battery when full
Avoid heat buildup with portable gaming monitor 4K units during extended sessions
Remember, optimizing power usage and charging efficiency often requires a balance between performance and battery life. Experiment with different settings to find the best configuration for your specific needs.
Final Thoughts
While portable monitors don’t charge like traditional laptops, their unique power capabilities significantly enhance mobile workflows. The USB-C Power Delivery feature in best portable monitors revolutionizes setups by charging devices directly – a true game-changer for laptop portable monitor users seeking streamlined solutions.
For gaming portable monitors or portable monitor for MacBook Pro setups, remember most models can’t fully power high-wattage devices. Still, their charging functionality adds valuable versatility to portable computer monitors.
Have questions about portable monitor setup or experiences to share? Comment below! If this helped you understand what is a portable monitor or its charging capabilities, share it with friends exploring portable monitors for laptops. Happy browsing!